
XAM
To create a store:
1.Open the Configuration tool from Start > Metalogix > Archive Manager Configuration or C:\Program Files (x86)\Common Files\PAM\PAMConfig\PAMConfig.exe
2.Select HSM from the features panel.
3.Click the Stores tab.
4.Click New Store from the Stores section. The Create a new Media Store wizard starts.

Enter the information as described below:
a.Media Store Type - select XAM from the drop down list.
b.Name of the new Media Store - enter a unique name for this store.
5.Click Next. The Media Store Administration Wizard step for the XAM opens.
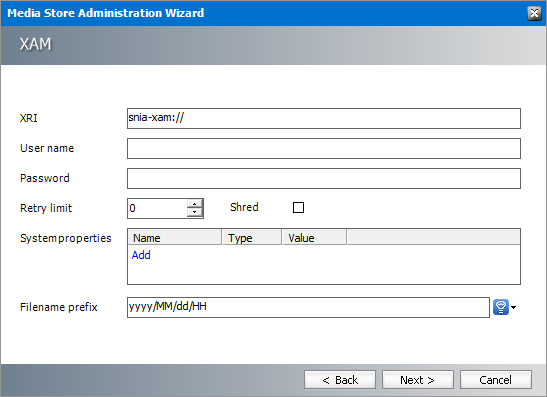
Enter the information as described below:
a.XRI - enter the specific path to the XRI store.
b.User name - Access key configured in the XAM instance.
c.Password - Password configured in the XAM instance.
d.Retry limit - set how many times the store should try to save a file.
e.System Properties - click Add and enter the system properties for the XAM instance.
f.Filename prefix - a unique prefix that you can create for each item stored in the media store. To construct a date type prefix, click 
6.Click Next.
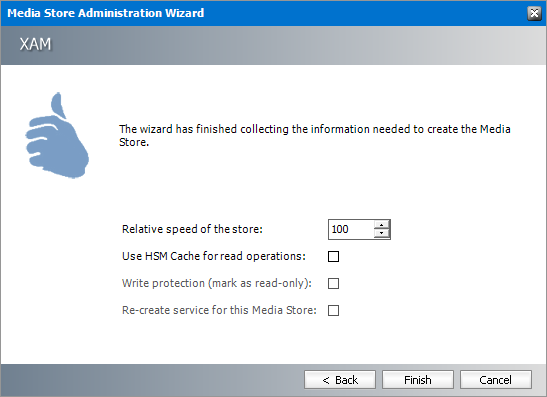
Enter the information as described below:
a.Relative speed of the store - the relative speed of this store compared to other stores.
b.Use HSM Cache for read operations - select this check box to allow HSM to use its internal cache to copy files during read operations.
c.Write protection (mark as read only) - not supported for this store type.
d.Re-create service for this Media Store - not supported for this store type.
7.Click Finish.
8.Restart HSM services.
9.Verify that the media store appears in the Stores section.
10.Create a Schema for this media store.
nscale
nscale from Ceyoniq Technology is an information platform that offers simple and robust document archiving. You can choose from two different options to integrate with nscale Web services or the nscale windows server.
To create a store:
1.Open the Configuration tool from Start > Metalogix > Archive Manager Configuration or C:\Program Files (x86)\Common Files\PAM\PAMConfig\PAMConfig.exe
2.Select HSM from the features panel.
3.Click the Stores tab.
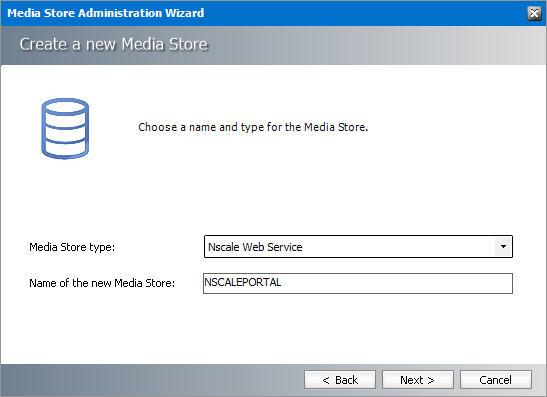
4.Click New Store from the Stores section. The Create a new Media Store wizard starts.
5.From the Media store drop down select either Nscale Web Service or Nscale File Server
6.Click Next. Depending on your selection of media store type, the property window opens.
or
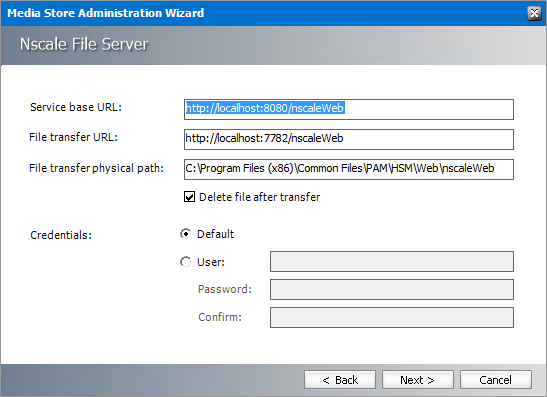
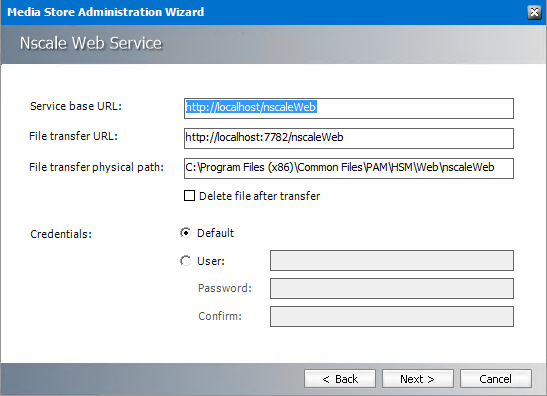
7.Enter the information as described below:
a.Service base URL - Enter the URL of your NSCALE Server in the format http://<nscale-webserver>:8080/nscaleweb
b.File transfer URL - Enter the URL of the HSM server to transfer the document between HSM and nscale server in the format http://<hsm-server>:7782/nscaleweb
c.File transfer physical path - Specify the path of the temporary Folder on the HSM Server where the file will keep during the transfer process.
d.Delete File after transfer - If checked, the file will be deleted from the above path once the file is transferred to the nscale server.
e.Credentials: Default - If selected, the web request will be authenticated using the credentials of the currently logged-on user.
f.Credentials: User - If selected, the web request will be authenticated using the username entered in the adjacent field.
i.Password - password of the user.
ii.Confirm - re-enter the password to confirm.
8.Click Next. The Settings window opens (for Nscale File server).
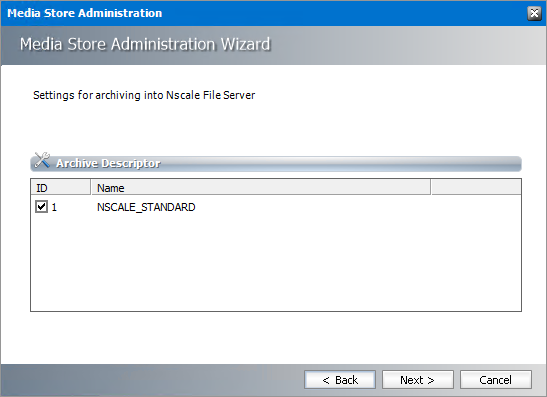
9.Select the default ID check box.
10.Click Next. The HSM settings window for this media store opens.

a.Relative speed of the store - relative speed of this store compared to other stores.
b.Use HSM Cache for read operations - If checked HSM will copy files into the cache when reading from this store.
a.Write protection (mark as read only) - not supported for this store type.
b.Re-create service for this Media Store - not supported for this store type.
11.Click Finish to complete the nscale integration.
Cloud Media Stores
Media storage systems have been steadily moving away from local storage to remote, server-based storage and processing. This chapter provides integration information with a host of cloud storage solutions. Most of the cloud stores use a flat file system with no directory structure that you see in Windows folders. However, some of them allow a hierarchical file names to imitate a folder structure. For example 2021/11/23/somefilename.txt
Wherever possible, hierarchical file names are configurable and the naming convention is based on the current date and time that allows granularity to milliseconds. For example you can use the prefix yyyy\MM\dd\HH\mm\ss\fff to name the files, or any arbitrary sub-string can be added to the format string.
In this chapter:
Rackspace Cloud Files
To create a store:
1.Open the Configuration tool from Start > Metalogix > Archive Manager Configuration or C:\Program Files (x86)\Common Files\PAM\PAMConfig\PAMConfig.exe
2.Select HSM from the features panel.
3.Click the Stores tab.
4.Click New Store from the Stores section. The Create a new Media Store wizard starts.

Enter the information as described below:
a.Media Store Type - select Rackspace Cloud Files from the drop down list.
b.Name of the new Media Store - enter a unique name for this store.
5.Click Next. The Media Store Administration Wizard step for the Rackspace Cloud Files opens.
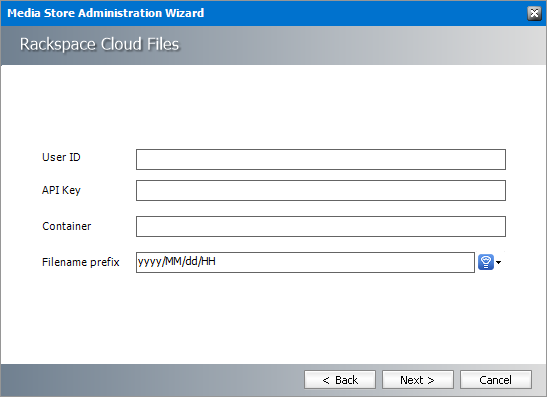
Enter the information as described below:
a.User ID - username for access to the Rackspace Cloud Files server.
b.API key - Access key to the API library configured in the Rackspace Cloud Files instance.
c.Container - Logical entity similar to file folders which store objects that consist of data and its descriptive metadata that is configured in Rackspace Cloud Files instance.
d.Filename prefix - a unique prefix that you can create for each item stored in the media store. To construct a date type prefix, click
6.Click Next.

Enter the information as described below:
a.Relative speed of the store - the relative speed of this store compared to other stores.
b.Use HSM Cache for read operations - select this check box to allow HSM to use its internal cache to copy files during read operations.
c.Write protection (mark as read only) - not supported for this store type.
d.Re-create service for this Media Store - not supported for this store type.
7.Click Finish.
8.Restart HSM services.
9.Verify that the media store appears in the Stores section.
10.Create a Schema for this media store.