Stores
In this topic:
·Steps to configure a media store
·Steps to test the HSM and Media Store connectivity
Steps to configure a media store
|
|
NOTE: A large selection of supported media store types are described in the Media Store Guide. |

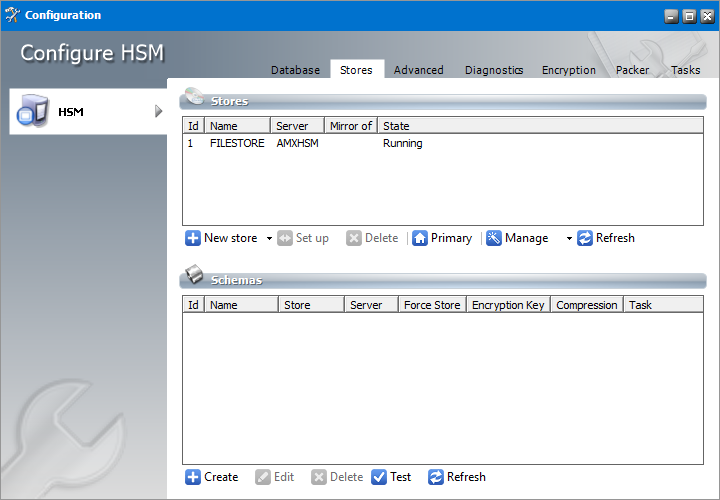
1.From the feature panel on the left of the Configuration wizard, click HSM and select the Stores tab.
2.From the Stores section click New Store. The Create a new media Store window opens.
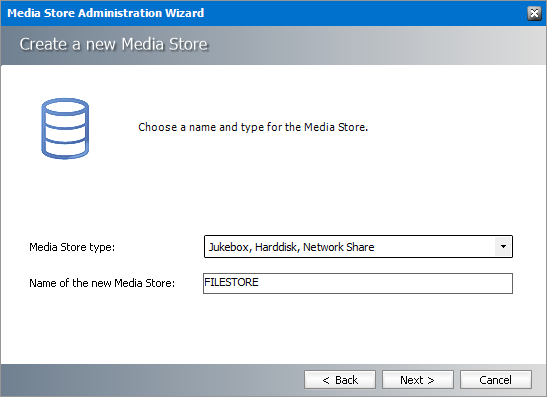
3.Click Next. The location information window opens.
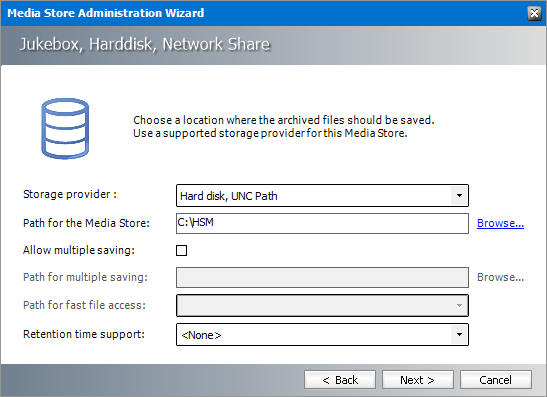
Enter the information as described below;
a.Storage Provider - select Hardisk, UNC Path because we are going to setup a media store in folder on the local hard drive.
b.Path for the media store - browse and create the folder if it does not exist (eg. C:\HSM). You could specify a UNC path to a shared folder as well.
c.Allow multiple saving - select this check box if you want to archive the file in an alternate location. For example C:\HSM-Backup.
d.Path for multiple saving - alternate media store location. Browse and create the folder if it does not exist (eg. C:\HSM). You could specify a UNC path to a shared folder as well. This field is available if Allow multiple saving selected.
e.Path for fast file access - choose between the Path for the media store and Path for multiple saving that are listed in the drop-down. Typically, if the first path is a slow media store like Pegasus Jukebox, and the second path is a large SAN like a local RAID or Harddisk, then you should use SAN because it is much faster. This field is available if Allow multiple saving selected.
|
|
NOTE: If archiving to one path fails, file store operation will result in an error. |
f.Retention time support - from the drop-down box, select one of two predefined retention time support options:
·NetApp SnapLock - if you are using NetApp and want to use SnapLock for compliance with law regulations about archiving of electronic documents. (e.g. HIPAA, OFRS, COSO etc.)
·EMC Celerra - if you use EMC Celerra.
4.Keep clicking Next to accept the default settings on each window until you reach the HSM server connection information window. Every media store must provide this information so the HSM server can connect to it. For more information about various media stores see the Archive Manager for Exchange - Media Store Administration Guide.
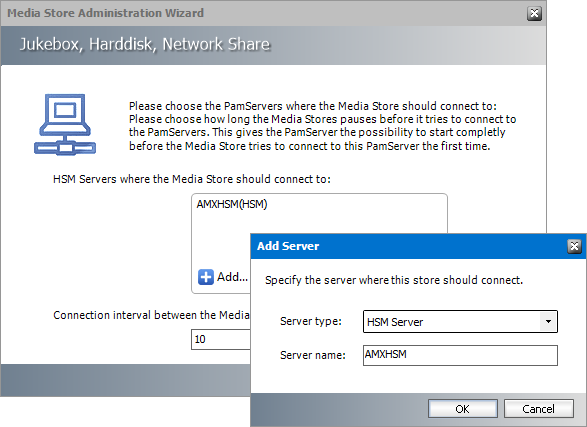
5.Click Add. The Add Server window opens. Enter the following information:
a.Server type - select HSM Server
b.Server name - name of the server where HSM is installed (eg. AMXHSM)
6.Click OK to close the window and add the the HSM Server to the list.
7.Click Next. The final configuration window appears.
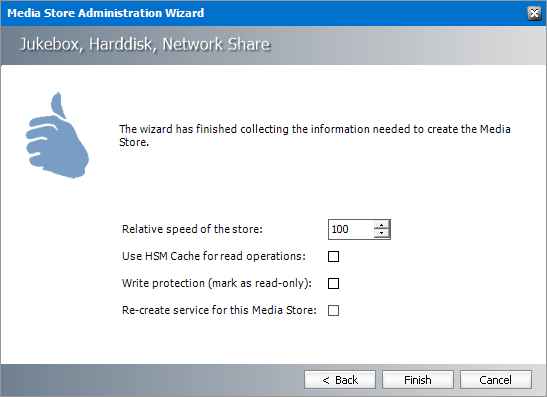
8.Accept the defaults and click Finish. The Service Restart window opens.
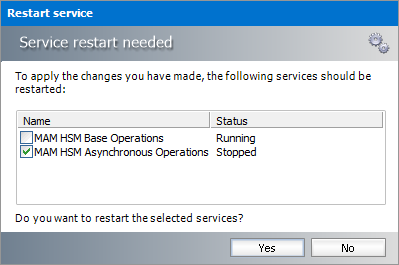
Select one or more check boxes where the Status indicates Stopped. Click Yes to restart the service so that the HSM service is aware of the media store configuration.
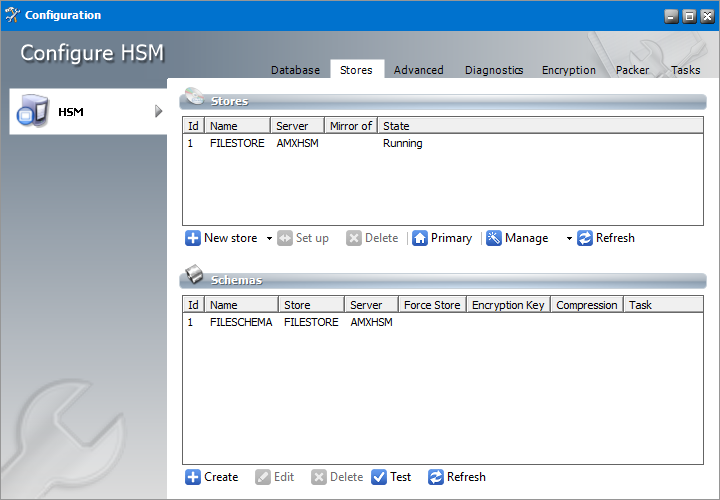
9.Verify that the media store information appears in the Stores tab of the Configuration wizard.
1.From the Schemas section in the Stores tab of the the Configuration wizard, click New Schema. The Create new schema window opens.
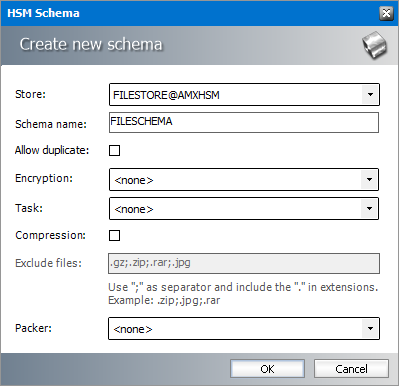
2.Enter the following information:
a. Store field - select a media store from the drop-down list that must be linked to this schema.
b.Schema name - enter a name for the schema (eg. FILESCHEMA)
c. Allow duplicate - select the check box to activate duplicate archiving. For example, when you archive a file in in Store A (linked to schema 1) and then archive it again in store B (linked to schema 2), the file is recognized as a duplicate and is archived to both stores.
d.Encryption - choose the appropriate encryption from the drop down list
e.Task - select a task from drop-down list that you want to assign to the schema. The task will run when the file is archived with the schema, e.g. copying the file to another media store. You must first create a task in the Tasks tab, but tasks with a delete operation are not displayed in the drop-down list.
f.Compression - select this check box to compress files as they are archived.
g.Exclude files - file types that you do not want to compress are listed here. This field is activated only if Compression is selected. List the desired files extensions by using a semicolon (;) to separate each extensions and prefix each file extension with a dot (.).
h.Packer - select a packer from the drop-down list. Packers join multiple files stored in HSM into large ZIP archives. Several large files as opposed to small ones increases disk space utilization and avoids internal disk fragmentation. Packers must be created in the Packer tab. It is not possible to have packer and task selected at once. If you must use a packer together with some other task operations, a packer operation can be defined directly as a task operation.
3.Click OK to save the schema information. In the Service Restart window that opens, select one or more check boxes where the Status indicates Stopped. Click Yes to restart the service so that the HSM service is aware of the schema information.
4.Verify that the schema information appears in the Schemas section of the Stores tab in the Configuration wizard.
5.Close the Configuration wizard.
Steps to test the media store connectivity
1.Open the Configuration wizard and select HSM from the feature panel.
2.Click the Stores tab. Then click Test from the Schemas section. The HSM Test window opens.
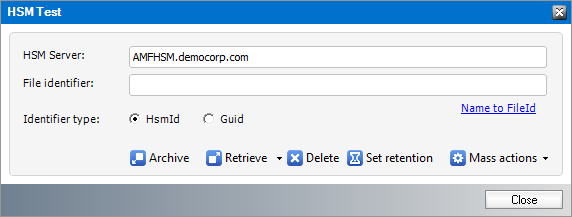
3.Click Archive. The Archive window opens.
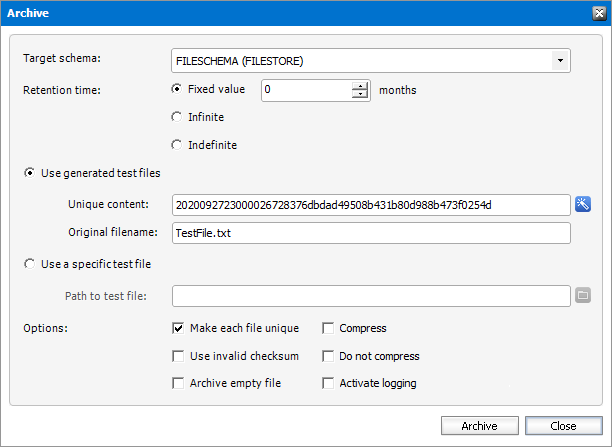
Enter the following information as necessary:
a.Target Schema - select the schema and media store pair from the drop-down list.
·Retention time - select from one of three retention time options to test how long an archived file will be retained in the media store:
·Fixed value - file will be retained for the number of months specified in the field.
·Infinite - file will be stored for ever.
·Indefinite - no specific retention time but it can be defined later.
b.Use generated test files - select this option if you want the system to generate a test file.
·Unique content - click 
·Original filename - name of the file that will be tested. You can keep the default file name or specify a different file name.
c.Use a specific test file - select this option if you want to use you own file to test. Enter the full file path in the Path to test file field or click 
d.Options - select one or more of the following to test additional archiving features.
·Make each file unique - new unique string is generated after each test archiving
·Use invalid checksum - select to test checksum verification.
·Archive empty file - select to test empty file archiving.
·Compress - select to compress test files.
·Do not compress - select for no compression even if the compression is activated.
·Activate logging - select to log the test operation.
4.Click Archive. The Result window opens.
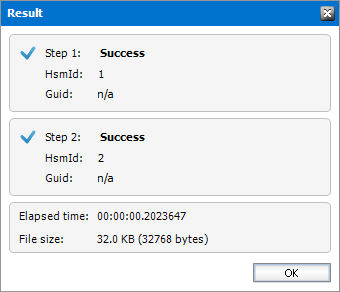
5.Verify that the result indicates success. Then click OK to close the Result window. Then close the Archive window.
6.In the HSM Test window, enter the name of the file that was archived in the Media Store during the archive test.
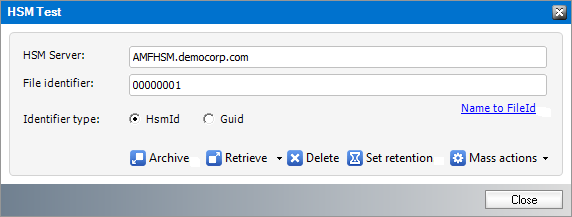
For example if the TestFile.txt was archived as 00000001.txt, enter 00000001 in the File Identifier field.
7.Click Retrieve. The Result window opens.
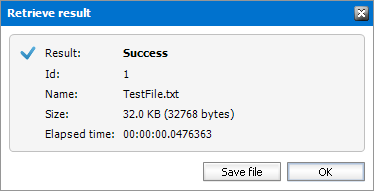
8.Verify that the result indicates success. Then click OK to close the Result window. Then close the other windows.
Optional Configuration
Configuration options described in this chapter are optional. They provide administrator with diagnostic, encryption, compression and async task possibilities.
In this chapter:
Advanced
This tab is used to configure the more advanced settings of HSM as single instancing, cache settings and temporary folder. After configuring all options press the Apply button.
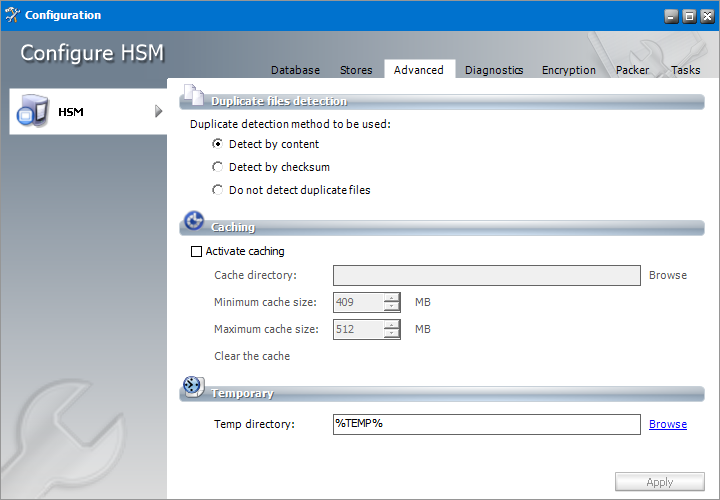
Duplicate files detection
Since the HSM system includes the Duplicate Files Detection service, it means that identical files are stored only once. In the Duplicate files detection section you may specify the detection method:
1.Select the Detect by content option, should you wish to use the size, checksum and content for detection.
2.Select the Detect by checksum option, should you wish to use the size and checksum for detection;
3.Select Do not detect duplicate files option, should you wish to deactivate this detection
If Allow duplicate in the Advanced tab is checked, the file is stored in both stores.
Caching
Use caching in case of slow storages (tape etc.). HSM will cache the recently used files to speed up the retrieving process.
If Activate caching is checked, HSM will copy all retrieved files to an HSM internal cache. To set the Cache directory (which should be a local hard disk), use the Browse button next to the respective text box. If you have a cluster, the HSM will know that each installation has its own path.
Set the Minimum cache size and Maximum cache size as well. The Minimum size should be about 80% of the cache size. If the cache is full, HSM will delete files (the oldest first) until the cache reaches the minimum size.
NOTE: To choose which Media Store should be cached, use the MediaStoreAdministrator tool. It is started when you click Launch on the Stores & Schemas tab.
Temporary
The HSM stores temporary files created during duplication detection, compression etc. in temporary directory. Its location can be set in Temp directory text box. Usage of environment variables is allowed in this box (e.g. %TEMP% denotes the temp folder of the currently logged on user).
Diagnostics
From time to time administrators need to check systems they manage, examine and analyze their behavior. This tab provides access to features that facilitate this task. Logs and tracing record HSM actions specified by the administrator at the defined extent.
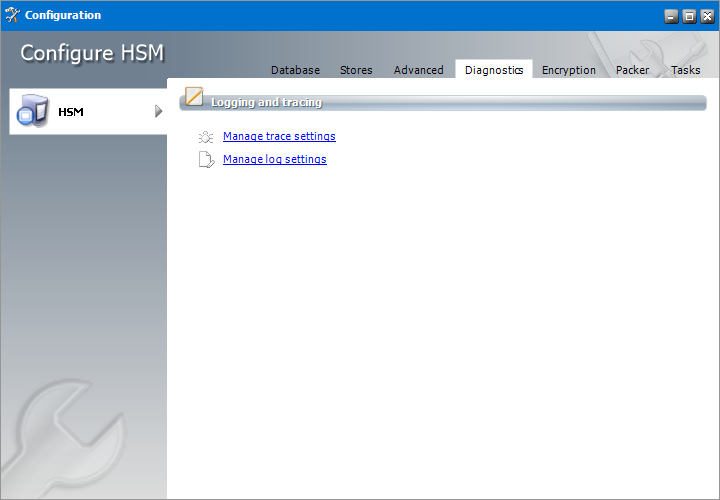
Manage trace settings
In the HSM Trace Settings configuration you can activate various kinds of loggings for the specific HSM components. Select the component in the list and then configure it by checking/unchecking the desired check boxes. Multi-select is possible.
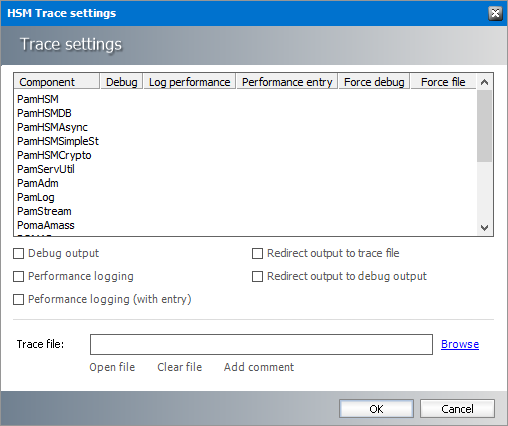
You can activate verbose logging (Debug Output), two kinds of performance loggings (logging information after a specific operation is completed or before a specific operation begins Performance logging and Performance logging (with entry) and choose whether you want to re-direct outputs either to debug output (Redirect output to debug output) or to the given trace file (Redirect output to trace file). In the case of Redirect output to trace file the path has to be specified in the Trace File box. The trace information will be logged there. You can also Open the trace file with the Open file button or delete its contents with the Clear File button. If you clear the file then the file itself wont be deleted. Use Add comment in case you wish to add some text to the file.
After changing the settings you want click the OK button. If you want to discard them click the Cancel button.
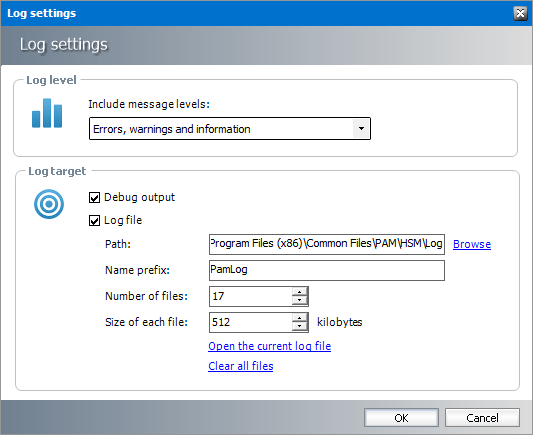
Manage log settings
In the Log settings dialog configure the overall HSM logs to your needs:
Include message levels define which information should be logged
oErrors only
oErrors and warnings
oErrors, warnings and Information
Debug output check to activate verbose logging
Log file check to save the messages in log files
Path set logs location
Name prefix define naming convention; log file name will include this prefix and a number
Number of files if a new log file should be created when the limit is reached, the oldest log file will be deleted
Size of each file when the defined size is reached, new log file will be started
Click Open the current log file to open it.
Clicking the Clear all files will delete all logs.