
Advanced Installation
Advanced installation uses the installation wizard to install Metalogix Archive Manager for Exchange and associated features on dedicated servers as described in the Deployment Plan. The installation wizard guides you through the installation of each feature on the various servers. In addition to the installation of the features, the installer wizard also helps you to verify, install and set up the prerequisites and accounts that you would have to do manually to prepare the environments for the installations.
|
|
NOTE: Some organizations prefer a more granular control on the installation process. You can choose to install all the features manually. For more information about the manual installation process, see the chapter Manual Installation. |

In this chapter:
·Prepare the Application Servers
oSteps to download the install media
oSteps to install the prerequisites
oSteps to install Microsoft Outlook
·Install the Application Features
oInstall HSM and Archive Manager Search
oInstall Archive Manager for Exchange (Archive server)
oInstall Archive Manager for Exchange (Retrieve server)
For next steps after you complete the advanced installation, see Application Configuration.
Setup the Superuser Account
A superuser account is a windows account with administrator privileges to work with Metalogix Archive Manager for Exchange administration tools, run services, manage databases, manage extensions. It also has elevated privileges to interact with the on-premise or online Microsoft Exchange servers.
In this topic:
1.Steps to create the superuser account
2.Steps to add the superuser to the Administrators group of the servers
3.Steps to add the superuser as a database user with sysadmin role (for Windows authentication only)
|
|
NOTE: There are more configuration steps necessary to grant elevated permissions to the superuser. When you use the Advanced Installation option from the Metalogix Archive Manager for Exchange installation wizard, all the other configurations are automatically completed for you. For the complete set of configuration steps, see Setup the Superuser Account in the manual installation chapter of this guide. |
Steps to create a superuser account
1.Log in to the domain controller.
2.Navigate to Start > Windows Administrative Tools > Active Directory Users and Computers.
3.From the Console Tree, expand the domain node.
4.Click the Users container. The list of users opens in the right-hand pane.
5.Click the Action menu and select New > User. The New Object - User window opens.
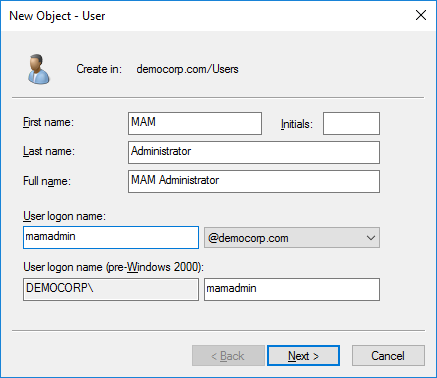
6.Verify that Create in title indicates the appropriate domain name and container, and then enter the details of the superuser. For example:
a.Full name: MAM Administrator
b.User logon name: mamadmin@democorp.com
7.Click Next.
8.Enter the password and confirm it. Then select Password never expires. Uncheck all other check boxes.
9.Click Next.

10.Verify the information and click Finish.
Steps to add the superuser to the Administrators group of the servers
The superuser must be able to run windows services and accomplish tasks that require administrator privileges on the Metalogix Archive Manager for Exchange feature servers. Follow the steps described below to grant administrator privilege to the superuser on each feature server.
1.Log in to each server with its local administrator credentials.
2.Navigate to Start > Windows Administrative Tools > Computer Management
3.From the Console Tree, navigate to the System Tools > Local Users and Groups > Groups container.
4.From the list of groups in the right-hand pane, right-click Administrators and select Properties from the context menu. The Administrators Properties window opens.
5.Click Add.
6.In the Enter the object name to select field, enter the user logon name of the super user. For example, enter sales\mamadmin
7.Click Check Names to verify the logon name.
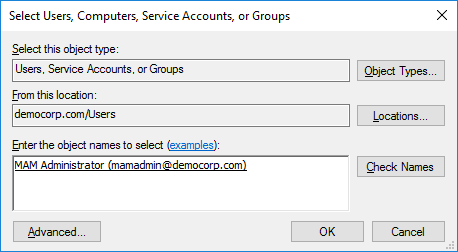
8.Click OK to add the superuser to the Administrator group.
9.In the Administrators Properties window, click Apply and OK to complete the process.
|
|
TIP: Log out of the server and log in again with the superuser's credentials to quickly verify that the superuser can access the server. |
Steps to add the superuser as a database user with sysadmin role
If you plan to use Windows authentication with a Microsoft SQL Server database, follow the steps described below:
1.Log in to the database server with your database administrator credentials.
2.Open the SQL Server Management Studio on your SQL server database server.
3.Log in to the server instance for Metalogix Archive Manager for Exchange databases.
4.Open the Security folder.
5.Right-click on the Logins folder and select New Login. The Login - New user properties window appears.
6.If you want to assign rights to a Windows account, select Windows authentication.
7.Provide the login name in the text box. You can use the Browse button to select an existing account if you chose Windows authentication (eg. democorp\mamadmin)
8.In the user properties window, click Server Roles from the Select a page panel and select the check box Sysadmin.
9.Click OK to create the account.
|
|
NOTE: Follow the above steps to add the installer account (eg. democorp\domadmin) with the Sysadmin role. |
Prepare the Application Servers
For the Archive Manager Database server (AMXDB)
See the System Requirements and About User Accounts chapters for preparing database servers.
For the HSM and Search server (AMXHSM)
·Steps to install the prerequisites
·Steps to download the install media
For the Archive server (AMXSERVER-A)
·Steps to install the prerequisites
·Steps to install Microsoft Outlook
·Steps to download the install media
For the Retrieve server (AMXSERVER-R)
·Steps to install the prerequisites
·Steps to install Microsoft Outlook
·Steps to download the install media
Steps to install the prerequisites
These steps are optional and are included if you want to install them yourself. The installer verifies prerequisites.
1.Log in with the credentials of the local administrator.
2.Open PowerShell as an Administrator.
3.To install the recommended windows roles and features for individual components that may be distributed across other servers run the following PowerShell commands:
Archive Manager for Exchange (for Archive and Retrieve servers)
Install-WindowsFeature -Name Web-Server, Web-Http-Redirect,
Web-Dyn-Compression, Web-Windows-Auth, Web-Basic-Auth,
Web-Metabase, Web-Mgmt-Service, RSAT-AD-PowerShell,
NET-Framework-45-Features, NET-Framework-45-ASPNET,
Web-Net-Ext45, Web-Asp-Net45, NET-WCF-Services45, Web-Asp-Net
HSM
Install-WindowsFeature -Name Web-Server, NET-Framework-Features
Search
Install-WindowsFeature -Name NET-Framework-Features
ArchiveWeb
Install-WindowsFeature -Name NET-WCF-HTTP-Activation45, Web-Server,
Web-Static-Content, Web-Http-Redirect, Web-Stat-Compression,
Web-Dyn-Compression, Web-Windows-Auth, Web-Basic-Auth
|
|
NOTE: These PowerShell commands are compatible with a Window 2016 operating system. Please refer to the System Requirements chapter to modify the script for other supported Windows operating systems or install them manually. |
4.Install the database drivers. For Microsoft SQL Server, the database driver is available in the folder <installation folder>\Archive Manager Installation Package\Install.
5.Install the redistributable packages required for your operating system. These files are available in the folder <installation folder>\Archive Manager Installation Package\Install.