
Check Mailboxes
This tool checks the connection between mailboxes available in the AMAC and the Microsoft Exchange Server. Use this tool:
·After the first installation of Archive Manager for Exchange.
·After configuration changes on Microsoft Exchange Server, like a mailbox migration.
Steps to use the Check Mailbox tool
1.From the Tools menu click Check mailboxes. The Check mailbox connections wizard opens. The list view displays mailboxes synchronized with Archive Manager for Exchange.
2.Select the check boxes below the list as described below:
·Include deleted mailboxes to display the mailboxes that were deleted.
·Include deactivated mailboxes to display the deactivated mailboxes.
3.Select the mailboxes for which you want to check the connection to Microsoft Exchange server.
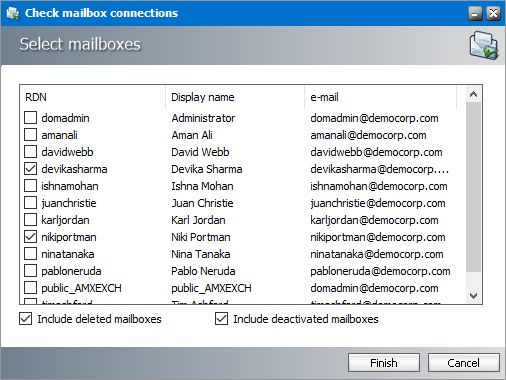
4.Click Finish to start checking the mailbox connections. The Checking in progress window opens.
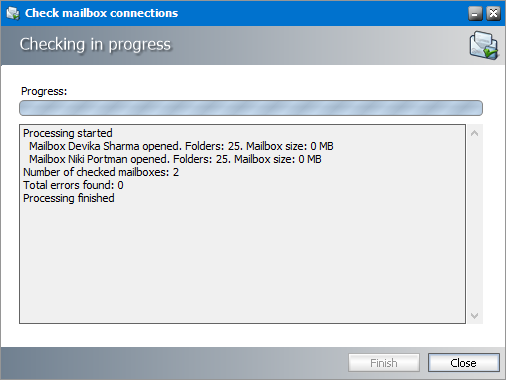
5.Verify the result and address any connection issues. Click Close to close the window.
Create Folders
The Create Folders tool helps you create custom folders in MS Outlook for one or more users that are available in the Address Book Manager.
Steps to create a folder in MS Outlook
1.From the Tools menu click Create Folders. The Create Folder Wizard opens.
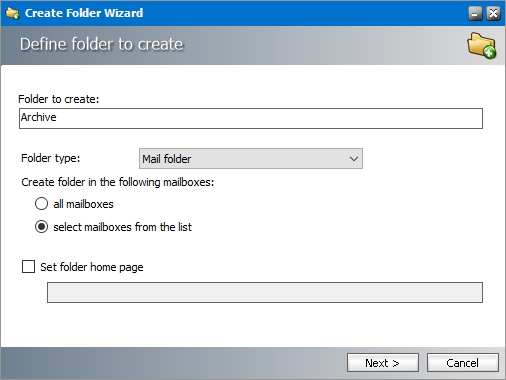
2.Specify the properties as described below:
a.Folder to create - specify the name of the folder to create. The default name is Archive and is specified as an an example.
b.Folder Type - specify the type from one of the standard types: Mail, Calendar, Contact, Task, Notes or Journal.
c.Create folder in the following mailboxes
·all mailboxes - choose this option to create the folder in all user mailboxes.
·select mailbox from the list - choose this option to select specific users from the user mailbox list available in Address Book Manager.
d.Set folder home page - Select the check box to set a home page for the created folder and then specify the URL for the home page. For example, the ArchiveWeb application can be made available to users in the folder.
3.Click Next. If you have selected the select mailbox from the list option, the Select mailboxes window opens.
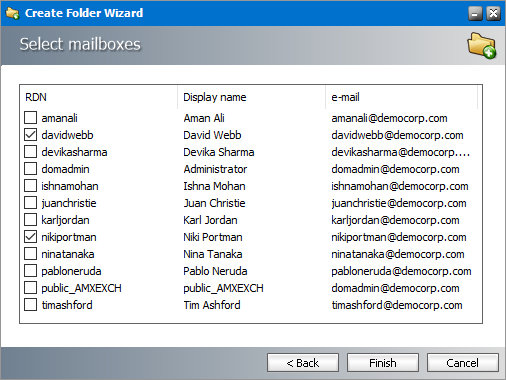
4.Select the mailboxes where the folder will be created. Then click Finish. The Folder creation in progress window opens.
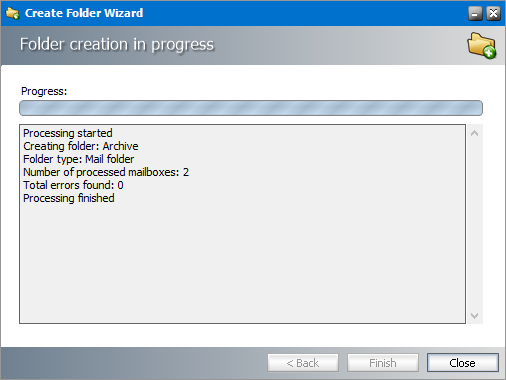
5.Verify the result and click Close to exit the tool.
Export Tasks
When you save a search result to an XML file using the Advanced Search feature of the AMAC, the Export Tasks tool helps you to export the email items in the search result to another mailbox or a PST file.
In this topic:
·Remove a task or refresh the task list
·Change the properties of a task
1.From the Tools menu click Export tasks. The Export Tasks window opens.
2.The table lists all the existing tasks otherwise the table is blank.
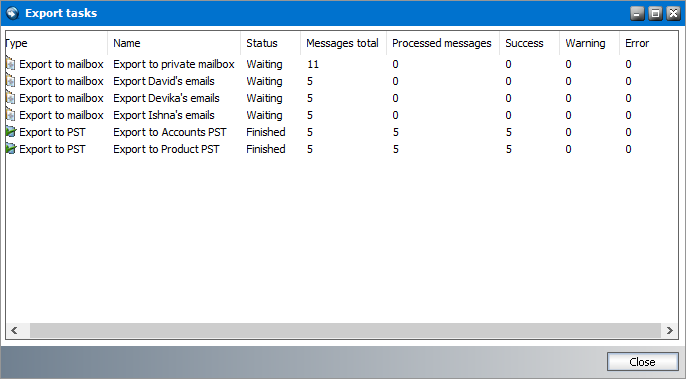
The columns are as described below. The columns can removed or added back when you right-click and choose Add/remove columns from the context menu. You can also click a column title to sort the rows in alphabetical order.
a.Type - the task type. Valid values are Export to mailbox or Export to PST.
b.Name - name of the task
c.Status - the status of the task. Valid values are Waiting, Finished, Processing.
d.Messages total - the number of email messages in the XML file that was attached to the task.
e.Processed messages - the number of email messages that the tool attempted to export.
f.Success - the number of email messages that were successfully exported.
g.Warning - the number of email messages that were exported with some data issues.
h.Error - the number of email messages that could not be exported.
i.Mailbox - identifier of the mailbox where the data will be exported if the task type is Export to mailbox.
j.PST File - path of the PST file where the data will be exported if the task type is Export to PST.
k.Folder - folder path where the Task details are stored. For example, C:\Program Files (x86)\Metalogix\MAM4Exchange\Export\<folder-identifier>
l.Target Folder - name of the root folder that will be created in the target mailbox or PST file.
m.Settings - Number that indicates a unique combination of settings from the Export Tasks Properties window.
n.Last Error - The most recent error that occured when the export task runs. For example, it could be a global error that caused the export task to fail or an error specifically related to the most recent item in the export task.
1.Right-click anywhere in the Export Tasks window and select Create new task. The Select export source window opens.
2.Enter a name for the task. We recommend that you use descriptive names to avoid confusion.
3.Click Load. The Open Search Result File window opens. Locate and select the XML file. Then click Open.
4.The file is attached to the task. Verify that the number of email messages indicated by the Number of loaded documents property is as expected.
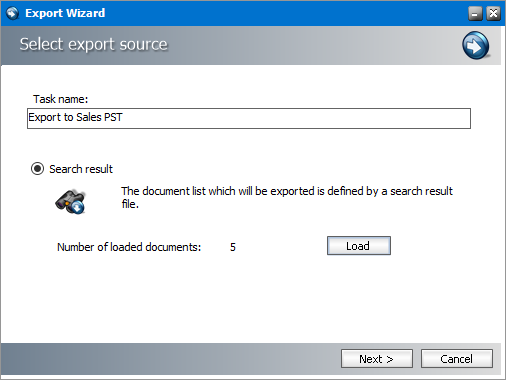
5.Click Next. The Select export destination window opens.
6.Select Export to mailbox or Export to PST.
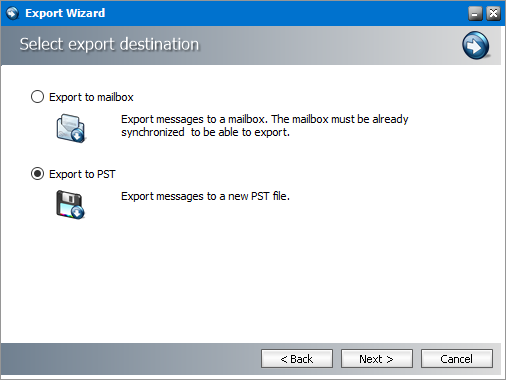
7.Click Next. The Export settings window opens.
The properties in this window apply to both destinations: mailbox or PST, and are described below:
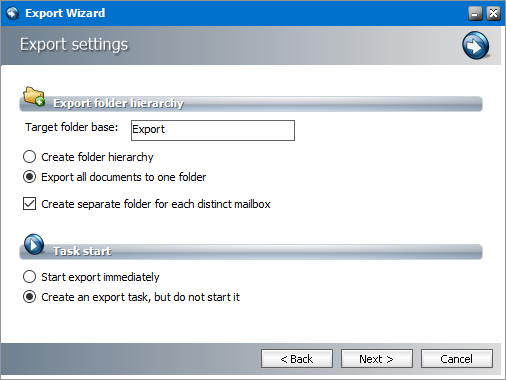
Export folder hierarchy
a.Target folder base - name of the folder that will be created when email items are exported to a mailbox or PST file. Default value is Export.
b.Create folder hierarchy - choosing this option creates a folder hierarchy as defined in the email being exported. For example, if the email is an inbox item, the email will be exported to the Export\Inbox folder.
c.Export all documents to one folder - choosing this option exports the messages to the same root folder specified in the Target folder base property.
d.Create separate folder for each distinct mailbox - Select this check box to create a sub-folder for each recipient mailbox that is specified in the message. For example if there are two messages in the source XML file that belong to different mailboxes like David Webb and
Task start
e.Start Export immediately -
f.Create and export task, but do not start it -
8.Click Next. The Summary window opens.
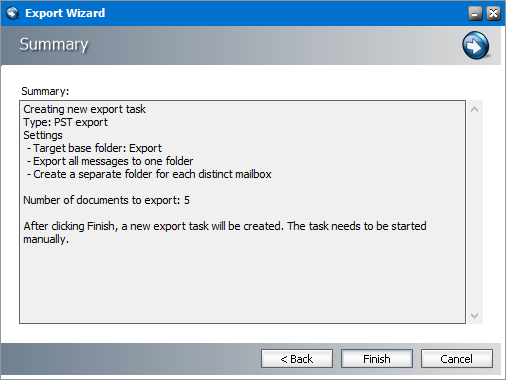
9.Verify the settings and click Finish. The new task appears in the task list of the Export Tasks window.
1.Select a task from the task list of the Export Tasks window.
2.Right-click the selected task to open the context menu.
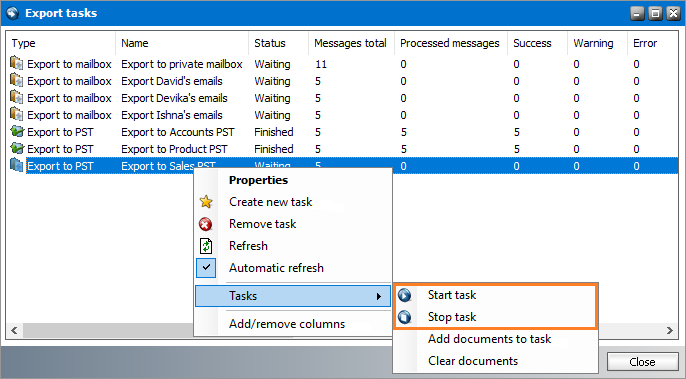
3.Click Tasks and then click Start task to start a task, or click Stop task to stop a task.
Steps to remove a task or refresh the task list
1.Select a task from the task list of the Export Tasks window.
2.Right-click the selected task to open the context menu.
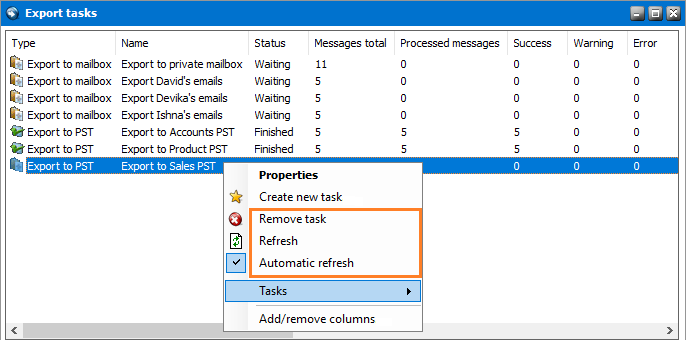
3.Click Remove task to remove a task from the task list. Click Yes to confirm the removal.
4.Choose between two options to refresh tasks:
a.Click Refresh to manually refresh the task list.
b.Right-click Automatic refresh to allow the application to refresh the task list every 15 seconds which is preferred for long task lists. After it is activated, you can right-click Automatic refresh again to deactivate it.
Steps to add documents to a task
Adding documents to tasks lets you combine more XML source files in one export task. This is helpful when you need to perform two searches with different search criteria and generate separate XML files for each search result.
1.Select a task from the task list of the Export Tasks window.
2.Right-click the selected task to open the context menu.
3.Click Tasks and then click Add documents to task. The Open Search Result File window opens.
4.Locate and select the XML file. Then click Open.
5.The document is added to task. The Messages total column value for the task will increase. Verify that the total is as expected.
Steps to remove documents from a task
1.Select a task from the task list of the Export Tasks window.
2.Right-click inside the window to open the context menu.
3.Click Tasks and then click Clear Documents.
4.Confirm that all documents will removed from the task.
5.Verify that the Messages total column value for the task is 0.
1.Select a task from the task list of the Export Tasks window.
2.Right-click inside the window and select Properties from the context menu. The Properties window opens.
a.Export task tab - allows you to view or change the name of the task and the export folder settings as described previously in this topic.
b.Documents tab displays task statistics.
·Documents of task - this section displays the statistics of the documents attached to the file.
·PST File Info - in this section you can check the Total PST size and set the Maximum size of the PST file. By default size is 2 GB. You can limit the file size when exporting. If the exported amount is exceeds this limit, a new file is created.
Statistics
Statistics functionality helps the administrator get an overview of:
·number of items archived during a specific period (Archived messages view)
·size of individual mailboxes and their archive (Archived size view)
To display the statistic overview in Archive Manager for Exchange, click Tools/Statistics on the main menu. The Statistics window opens by default in the Archived messages view. Switch between views in the left pane of the window.
To get statistics on the number of archived messages, select the Archived messages view in the left pane. In the Date range section define the time period for which you want to generate the statistics. If you have selected "Interval, specify the time span in the From/to text boxes (either overwrite the dates or click the down arrows to select desired days in the calendar).
As a next step sort the data by hours/days/weeks/months/years as you select the respective option in the Grouping section. Finally click Apply.

The statistical data for the chosen time period will be represented in the form of a graph and on the Data tab as a statistics table. To export the statistical data, click the Export button and then select the export folder.
|
|
TIP: Use the icons in the upper bar of the Statistics window to switch between bar graph () and line graph (). It is also possible to zoom parts of the graph. Simply click inside the graph and draw the cursor to select the part which you want to zoom. To un-zoom, right-click inside the graph. In the context menu select Un-Zoom. The graph context menu offers also additional commands as Print, Save Image As etc. |

To get an overview of individual mailboxes, the size of messages, archive, shortcuts etc. switch to the Archive size view in the left pane. On the Mailboxes tab check the mailboxes for which you want to generate the statistics and click Run.
|
|
NOTE: If you check the Include Exchange size check box the report will contain a new column: current size of the mailbox on Microsoft Exchange. This helps you to report the size of the mailbox after archiving. |
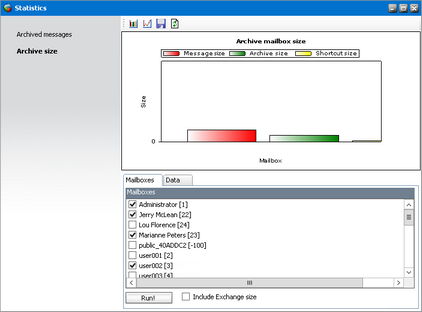
The statistical data for the chosen mailboxes will be represented in the form of a graph and on the Data tab as a statistics table. Colors in the graph represent the following:


|
|
NOTE: Overview reports for mailboxes can be created in the Manager view from the Settings tab > Archive size report. The Export wizard on that tab offers advanced functionality. The report can be exported and adjusted to the administrators needs |