
Section 9. Migrator Pro for Active Directory Agent Installation
9.1 Installing the Migrator Pro for Active Directory Agent on Devices
The Migrator Pro for Active Directory Agent is a key component of Active Directory migration. The agent contacts the Migrator Pro for Active Directory server at regular intervals, called polling, looking for jobs and tasks to perform.
Refer to the Requirements to verify all workstations and servers meet the requirements for agent installation.
Agent Installation
The agent can be installed using a GPO (Group Policy Object) or manually.
To install the agent with a GPO:
-
Right-click on the Migrator Pro for Active Directory Agent Installer MSI, point to Share with, and click on specific people.
-
Add a security group. The "authenticated users" group already includes all computers and is a good group to use. The group you add must have the shared Read permission and NTFS permission.
-
Click Share.
-
Click Done.
-
From the Start menu, point to Administrative Tools and click on Group Policy Management.
-
Right-click on the domain or OU you will be migrating and click on Create a GPO in this domain, and link it here.
-
In the New GPO dialog box, enter a Name for the GPO and click OK.
-
Click on the new GPO and click OK.
-
Right-click on the GPO and select Edit.
-
Open Computer Configuration > Policies > Software Settings and right-click on Software Installation and then point to New and click on Package.
-
In the File Name field, enter the UNC path to the MSI file and click Open.
-
Select the Active Directory Pro Agent and click Open.
-
In the Deploy Software window, select the Assigned deployment method and click OK.
|
|
The device must be rebooted for the applied group policy to complete the agent installation. |

To verify the GPO:
-
Log on to a workstation within the scope of the GPO using administrator credentials.
-
From a command prompt on the workstation, run gpresult -r
-
The Computer Settings section will display the applied group policy.
|
|
A newly applied group policy will not immediately be displayed. The Computer Settings section displays the applied group policy, but the agent installation is not completed until the device is rebooted. |
To manually install the agent:
-
Copy the Active Directory Pro Agent Installer MSI file to each computer.
-
Double-click the file to open the installer.
-
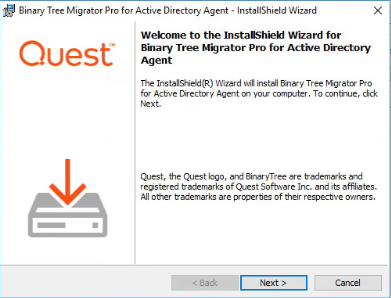
On the Welcome screen, click Next.
-
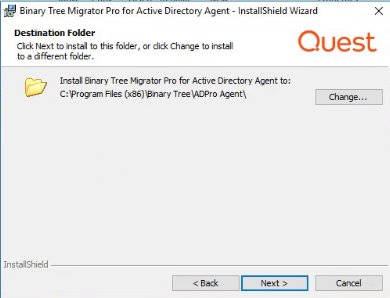
On the Destination Folder screen, click Next.
-
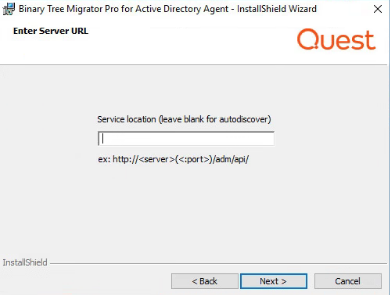
On the Enter Server URL screen, enter the FQDN of the server running the Migrator Pro for Active Directory service and click Next.
|
|
Leave this screen blank if an SRV record has been created. See Creating SRV Records below for more information. If there is an SRV record found in the Domain, any entry manually entered during the agent install for the Server URI will be ignored. |
-
On the Ready to Install the Program screen, click Install.

-
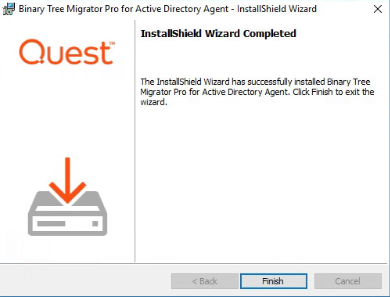
When the install completes, click Finish.
Refer to the Troubleshooting section to resolve common agent install issues.
Creating SRV Records
The Migrator Pro for Active Directory Agent uses DNS to "autodiscover" the Migrator Pro for Active Directory server. An SRV (service location) record must be created in DNS to point the clients to the correct server or servers.
To create an SRV record using DNS Manager:
-
In the DNS Manager, right-click on the DNS server and click on Other New Records.
-
In the Resource Record Type dialog, select the Service Location (SRV) type and click Create Record.
-
In the New Resource Record dialog, enter "_btadm" in the Service field.
-
Enter the following information for HTTP or HTTPS:
-
For HTTP:
Protocol: _http
Priority: 0
Weight: 0
Port Number: 80
Host offering the service: the FQDN of server running the Migrator Pro for Active Directory service.
-
For HTTPS:
Protocol: _https
Priority: 0
Weight: 0
Port Number: 443
Host offering the service: the FQDN of server running the Migrator Pro for Active Directory service.
|
|
You can make SRV records using HTTP, HTTPS, or both protocols. Using HTTPS is suggested for increased security. If both protocols are used, the agent will always attempt to use HTTPS first. |
-
Click OK.
Every client running the agent software must be able to resolve the DNS records.
To verify the clients can resolve the SRV DNS records:
-
Open a command prompt on the client machine.
-
Run nslookup -q=srv _btadm._http.source.int where "http" is the protocol: http or https, and "source.int" is the name of the source domain.
9.1 Installing the Migrator Pro for Active Directory Agent on Devices
9.1 Installing the Migrator Pro for Active Directory Agent on Devices
The Migrator Pro for Active Directory Agent is a key component of Active Directory migration. The agent contacts the Migrator Pro for Active Directory server at regular intervals, called polling, looking for jobs and tasks to perform.
Refer to the Requirements to verify all workstations and servers meet the requirements for agent installation.
Agent Installation
The agent can be installed using a GPO (Group Policy Object) or manually.
To install the agent with a GPO:
-
Right-click on the Migrator Pro for Active Directory Agent Installer MSI, point to Share with, and click on specific people.
-
Add a security group. The "authenticated users" group already includes all computers and is a good group to use. The group you add must have the shared Read permission and NTFS permission.
-
Click Share.
-
Click Done.
-
From the Start menu, point to Administrative Tools and click on Group Policy Management.
-
Right-click on the domain or OU you will be migrating and click on Create a GPO in this domain, and link it here.
-
In the New GPO dialog box, enter a Name for the GPO and click OK.
-
Click on the new GPO and click OK.
-
Right-click on the GPO and select Edit.
-
Open Computer Configuration > Policies > Software Settings and right-click on Software Installation and then point to New and click on Package.
-
In the File Name field, enter the UNC path to the MSI file and click Open.
-
Select the Active Directory Pro Agent and click Open.
-
In the Deploy Software window, select the Assigned deployment method and click OK.
|
|
The device must be rebooted for the applied group policy to complete the agent installation. |
To verify the GPO:
-
Log on to a workstation within the scope of the GPO using administrator credentials.
-
From a command prompt on the workstation, run gpresult -r
-
The Computer Settings section will display the applied group policy.
|
|
A newly applied group policy will not immediately be displayed. The Computer Settings section displays the applied group policy, but the agent installation is not completed until the device is rebooted. |
To manually install the agent:
-
Copy the Active Directory Pro Agent Installer MSI file to each computer.
-
Double-click the file to open the installer.
-
On the Welcome screen, click Next.
-
On the Destination Folder screen, click Next.
-
On the Enter Server URL screen, enter the FQDN of the server running the Migrator Pro for Active Directory service and click Next.
|
|
Leave this screen blank if an SRV record has been created. See Creating SRV Records below for more information. If there is an SRV record found in the Domain, any entry manually entered during the agent install for the Server URI will be ignored. |
-
On the Ready to Install the Program screen, click Install.
-
When the install completes, click Finish.
Refer to the Troubleshooting section to resolve common agent install issues.
Creating SRV Records
The Migrator Pro for Active Directory Agent uses DNS to "autodiscover" the Migrator Pro for Active Directory server. An SRV (service location) record must be created in DNS to point the clients to the correct server or servers.
To create an SRV record using DNS Manager:
-
In the DNS Manager, right-click on the DNS server and click on Other New Records.
-
In the Resource Record Type dialog, select the Service Location (SRV) type and click Create Record.
-
In the New Resource Record dialog, enter "_btadm" in the Service field.
-
Enter the following information for HTTP or HTTPS:
-
For HTTP:
Protocol: _http
Priority: 0
Weight: 0
Port Number: 80
Host offering the service: the FQDN of server running the Migrator Pro for Active Directory service.
-
For HTTPS:
Protocol: _https
Priority: 0
Weight: 0
Port Number: 443
Host offering the service: the FQDN of server running the Migrator Pro for Active Directory service.
|
|
You can make SRV records using HTTP, HTTPS, or both protocols. Using HTTPS is suggested for increased security. If both protocols are used, the agent will always attempt to use HTTPS first. |
-
Click OK.
Every client running the agent software must be able to resolve the DNS records.
To verify the clients can resolve the SRV DNS records:
-
Open a command prompt on the client machine.
-
Run nslookup -q=srv _btadm._http.source.int where "http" is the protocol: http or https, and "source.int" is the name of the source domain.
Section 10. Troubleshooting
10.1 Migrator Pro for Active Directory Agent Installation Troubleshooting
-
Problem: The device registers but does not get discovered (Discovery Status remains blank in the Migrator Pro for Active Directory console).
Solution: Install PowerShell 2.0 or higher on the client. Operating systems earlier than Windows 7 do not natively include PowerShell.
-
Problem: During manual installation, a "wizard interrupted" error appears.
Solution: Install .NET 4.5.2 or higher on the client and run the installer again.
-
Problem: After a successful manual install, an "Unable to register" error appears in the Event Viewer.
Solution: Verify the path to the Migrator Pro for Active Directory server is correct and complete.
-
Problem: After a successful manual install, an "Unable to auto-discover" error appears in the Event Viewer.
Solution: The SRV records are missing, incorrect, or unreachable. Verify SRV records are set up properly.
10.1 Migrator Pro for Active Directory Agent Installation Troubleshooting
10.1 Migrator Pro for Active Directory Agent Installation Troubleshooting
-
Problem: The device registers but does not get discovered (Discovery Status remains blank in the Migrator Pro for Active Directory console).
Solution: Install PowerShell 2.0 or higher on the client. Operating systems earlier than Windows 7 do not natively include PowerShell.
-
Problem: During manual installation, a "wizard interrupted" error appears.
Solution: Install .NET 4.5.2 or higher on the client and run the installer again.
-
Problem: After a successful manual install, an "Unable to register" error appears in the Event Viewer.
Solution: Verify the path to the Migrator Pro for Active Directory server is correct and complete.
-
Problem: After a successful manual install, an "Unable to auto-discover" error appears in the Event Viewer.
Solution: The SRV records are missing, incorrect, or unreachable. Verify SRV records are set up properly.