
Appendix A: ZApp
Choose ZApp Support Option
The administrator must determine how the ZApp software will be used prior to implementation.
Choose one of the ZApp support options below. The number of the option (0, 1, 2, or 3) will be assigned to the BTZAPPSUPPORT INI file variable.
-
Create a Multi-Purpose Group with the name of BTZAppAdmins (only required if selecting options 1 or 3); include any administrators that will be responsible for maintaining the BT Document Store database; choose these administrators with care, as members of this group will bypass document level security within the BT Document Store
|
|
|

-
Click Save & Close to save the document
|
Option |
Description and Instructions |
|
0 |
“0” indicates ZApp is not being used or a license has not been purchased If ZApp is disabled no additional settings are required besides BTZAPPSUPPORT=0 and creation of BTStore.nsf |
|
1 |
“1” will store the original body in BTStore.nsf and send a link to the user
If ZApp option 1 is selected, the following ZApp parameters will need to be defined in the Coex Notes.ini: All ZAap configurations require the following INI parameters:
|
|
2 |
“2” will convert the original body into an attachment and send it to the user
If ZApp option 2 or 3 is selected, the following ZApp INI file variables will need to be defined:
|
|
3 |
Combination of 2 & 3
ZApp offers multiple configuration options/settings to meet the client or application owner’s needs. Please review the additional settings after configuration of Integration for Notes as it can slow down the process to test and retest ZApp functionality. It is best to include customer/client resources in the configuration and understanding of the ZApp toolset. |
Choose ZApp Support Option
The administrator must determine how the ZApp software will be used prior to implementation.
Choose one of the ZApp support options below. The number of the option (0, 1, 2, or 3) will be assigned to the BTZAPPSUPPORT INI file variable.
-
Create a Multi-Purpose Group with the name of BTZAppAdmins (only required if selecting options 1 or 3); include any administrators that will be responsible for maintaining the BT Document Store database; choose these administrators with care, as members of this group will bypass document level security within the BT Document Store
|
|
|
-
Click Save & Close to save the document
|
Option |
Description and Instructions |
|
0 |
“0” indicates ZApp is not being used or a license has not been purchased If ZApp is disabled no additional settings are required besides BTZAPPSUPPORT=0 and creation of BTStore.nsf |
|
1 |
“1” will store the original body in BTStore.nsf and send a link to the user
If ZApp option 1 is selected, the following ZApp parameters will need to be defined in the Coex Notes.ini: All ZAap configurations require the following INI parameters:
|
|
2 |
“2” will convert the original body into an attachment and send it to the user
If ZApp option 2 or 3 is selected, the following ZApp INI file variables will need to be defined:
|
|
3 |
Combination of 2 & 3
ZApp offers multiple configuration options/settings to meet the client or application owner’s needs. Please review the additional settings after configuration of Integration for Notes as it can slow down the process to test and retest ZApp functionality. It is best to include customer/client resources in the configuration and understanding of the ZApp toolset. |
Installing ZApp
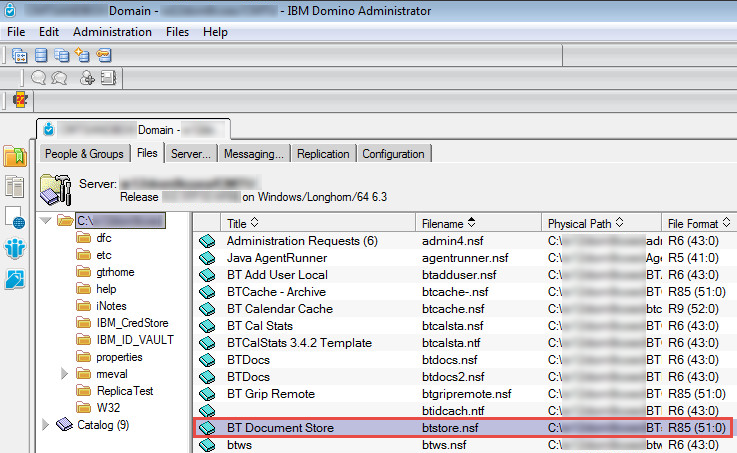
Installing ZApp consists of adding the BTStore.ntf template and creating a new BTStore database for the configuration. Create a new database in the Data directory of the Domino Coexistence server based on the BTDocument Store (btstore.ntf) template. Title the new database BT Document Store with a filename of btstore.nsf.
If the ZApp database has already been created, open it and follow the configuration steps below
Add the BTStore.ntf Template
-
After installing Integration for Notes the BTStore.ntf template will appear in the Domino Data Directory:
-
If the template does not appear in the data directory, reinstall Integration for Notes and verify the ZApp module is selected
-
The coexistence server may need to be restarted to use the new databases created from the copied template files

Configure Security for BTStore Database for Integration for Notes
Integration for Notes uses a mail-in storage database to store all mail-enabled application messages in a single store repository that provides document-level security and allows Exchange/Outlook users to access any applications during coexistence.
-
Open the Domino Administration client on the coexistence server
-
From the Domino Administrator, open the server, and then navigate to the Files tab as shown below; select Databases only from the Show Me: drop-down box
-
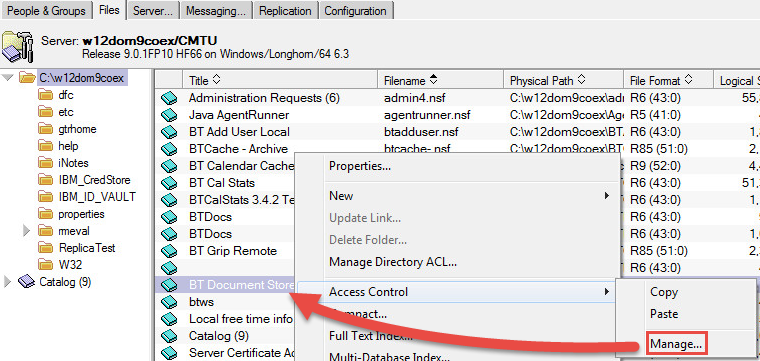
Right-click BTStore.nsf
-
Select Access Control -> Manage to set up the ACL as shown below:
-
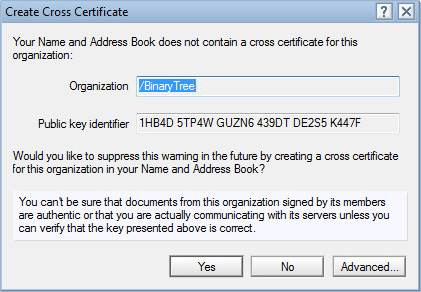
Because the database is new and not signed or secured, if a prompt appears to cross-certify the signature as seen below, select Yes:
-
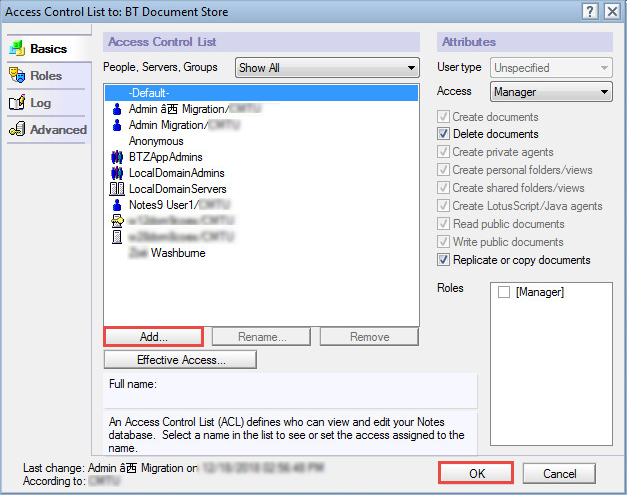
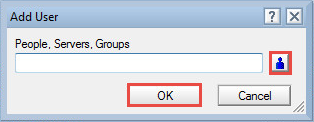
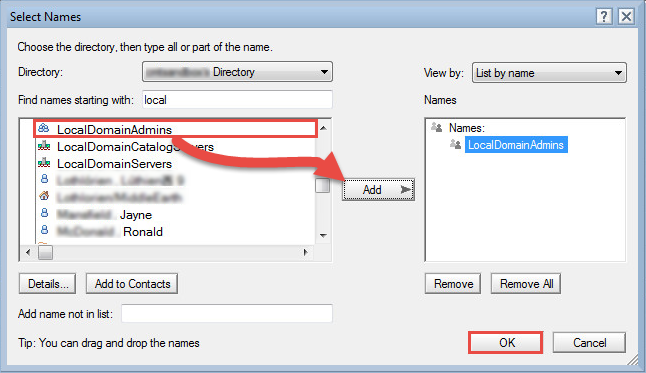
The ACL displays; add the Domino Administrators for the domain or LocalDomainAdmin as shown below and click Add; from the Add User dialog box, select LocalDomainAdmin, and then click OK:
-
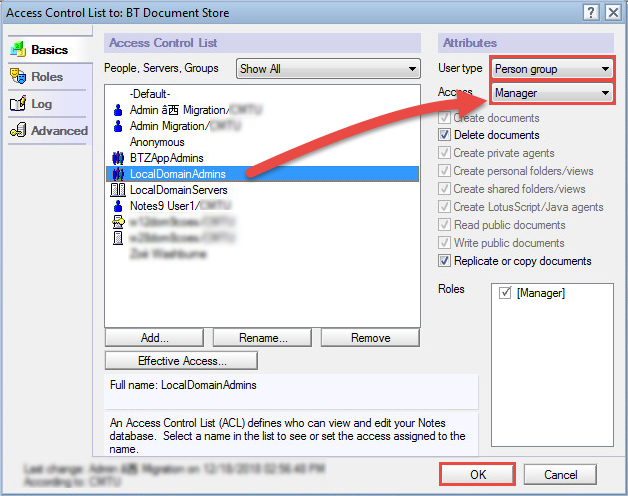
Change the user types to Person group for LocalDomainAdmins as shown below; additionally, grant the LocalDomainAdmins [Manager] role to view additional configuration options in the BTStore database:
-
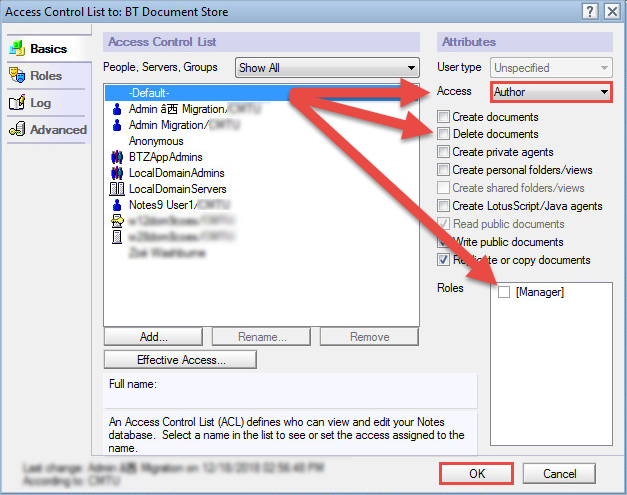
Demote the Default group by giving it only Author without delete access; this database has document security and its own set of purging options, as you do not want users deleting documents even by mistake:
Configure ZApp NOTES.INI Parameters
The ZApp NOTES.INI parameters are defined in the Zero-Touch Application Remediation (ZApp) section.
Copy the following parameters to your Notes.ini file if they are not currently present at the end of the Binary Tree Customizations. The values below are what is shown by default. You may to change some of the values to meet your deployment needs.
|
;Begin ZAPP ini settings BTSTOREDB=BTStore.nsf BTSTORETEXT1=email sent to you from Notes contains specific elements requiring Notes Client\n\nPlease press link below to access it\n\n BTSTORETEXT2=This is BTStoreText2.\n BTSTORETEXT3=This is BTStoreText3.\n BTSTORETEXT4=Click here for Server Access [<a href="notes://<servername>/86257316:0041FCE6">Click Here</a>]\n BTZAPPBYPASS=1 BTZAPPCHECKENCRYPT=1 (Not needed if using On the Fly Decryption and Encryption) BTZAPPENCRYPTTEXT1=Dear User\n\n\tYou cannot access the contents of this document because they are encrypted with a Notes certificate. BTZAPPENCRYPTTEXT2=\n\nThese cannot be read. BTZAPPORGS=CMTU BTZAPPREADERS=LOCALDOMAINADMINS BTZAPPSENDORIGINAL=0 BTZAPPSUPPORT=1 BTZAPPIGNORESTOREDFORMS=0 BTZAPPUNIQUECOPY=Y BTZAPPTABLES=Y ;End ZAPP ini settings |
ZApp Administration Functions
Now that the BTStore database has been created on the Coexistence server, the Administration settings for the database can be configured.
-
Open the server document from the Domino Administrator Client and navigate to the Files tab as outlined below
-
Before opening the new database, sign it by the server to avoid any ECL prompts. Right-click the database and select Sign
-
Double-click on the BTStore.nsf database to open it and set the Administration properties as shown below
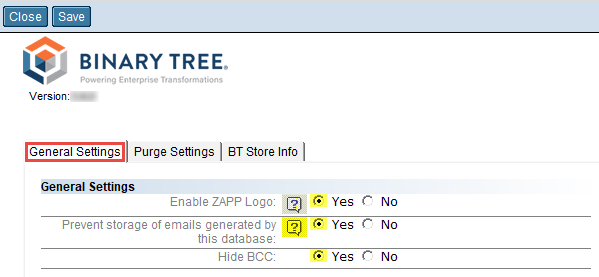
General Settings
-
Enable ZAPP Logo will display the BTZapp icon in the top left corner of messages if set to Yes (OR refer to the database Help)
-
Prevent storage of e-mails generated in this database, if set to Yes, will prevent the storage of messages replied to or sent from within BTStore database
-
Hide BCC, if the BTZAPPUNIQUECOPY configuration parameter is set to NO, will prevent the viewing of BCC recipients in a shared message. If set to Yes, the user can receive links to messages missing their name in the header fields
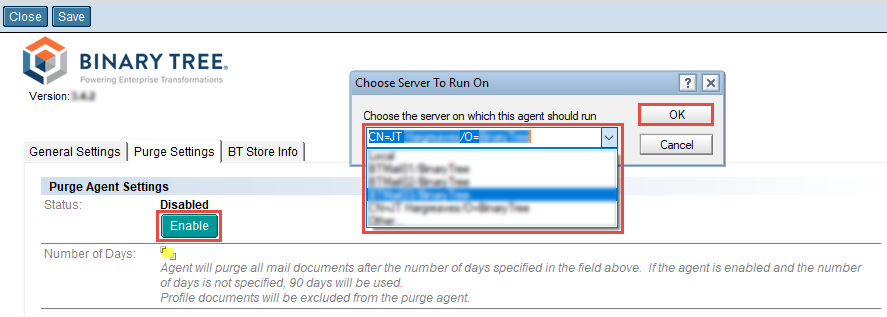
Purge Settings:
-
Status, when Enabled, will automatically purge all mail documents after the number of days specified in the Number of Days field
-
Days indicates the number of days to keep documents in the BTStore database
-
Choose Server To Run On – Pick the Domino server to run the purge agent (enable the purge agent on the administrative server)
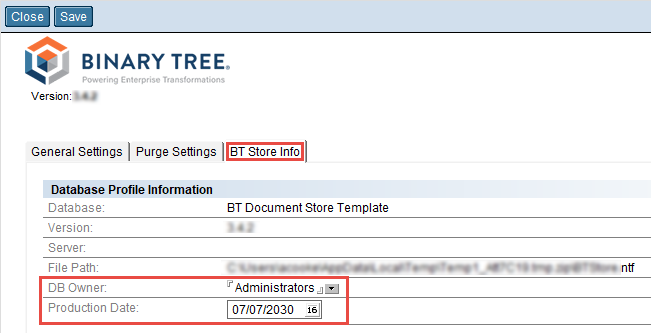
BT Store Info tab
-
Set the DB Owner field value to either Admin or Agent ID
-
Set the Production Date; this is the date that BTCal will go into production
Testing ZApp
To test the ZAapp process, restart the BTCal task on the Coexistence server, then create a test email that is to be remediated for having a hotspot button.
-
From the console of the Coexistence server, enter the command Tell BTCal Quit, and then when it terminates, enter the command Load BTCal
-
From Migration Administration e-mail file, create a new memo to an Exchange and add a hotspot button as shown below
-
Create a simple button with a message box
-
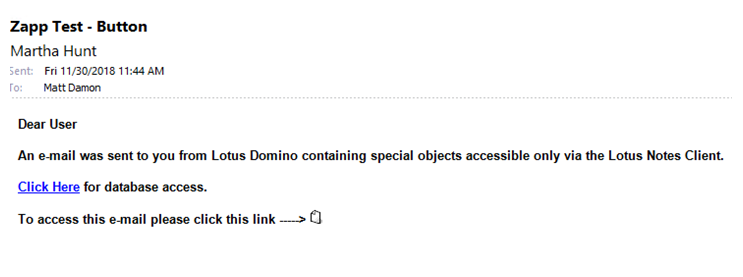
Send the e-mail to the Exchange User, and then open the ZApp Database to see if it was remediated
-
The screenshot below shows what a plain ZApp notification looks like; the actual message that Exchange/Outlook users will see may be different depending on how ZApp is configured
Appendix B: Configure GRIP
This section contains general information about the GRIP feature. For installation instructions, please refer to the attachment at the end of this section (Installation and Configuration of the GRIP Subsystem).