
Create/Edit Permission Level
Security Manager allows administrators to create new Permission Levels or edit permissions within an existing one.
1.Select a site from the Navigation area.
2.Press the Permission Levels button to view a list of existing levels.
3.Press the Create/Grant button and select the "Create Permission Level" option to activate the window.
4.In the provided window, enter a name and description.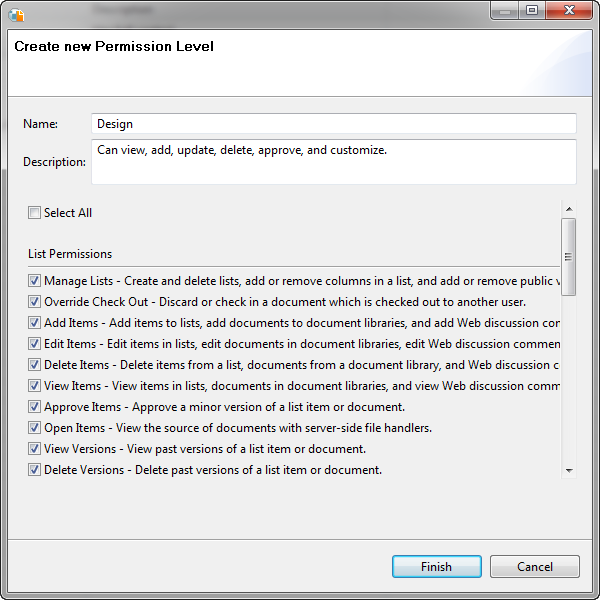
5.Select the Permissions that apply from the provided list.
6.Press Finish to begin the operation.
|
|
NOTE: ·An existing Permission Level may be edited by selecting it in the Permission Level window and then pressing the Edit button in the ribbon. ·An existing Permission Level may be removed selecting it in the Permission Level window and then pressing the Delete button in the ribbon. |

Copy Permission Level
The application allows administrators to copy one or more permission levels from one site to another.
|
|
NOTE: While Essentials can create custom (user-defined) permission levels on the target, it cannot create built-in (system-defined) permission levels. Therefore, if a built-in permission level does not exist on the target, it will not be carried over from the source. |
1.Select the appropriate site in the Navigation pane
2.Click the Permission Levels button in the ribbon (or from the site level right-click menu select Permissions>Show Permission Levels) .
3.In the provided window select one or more permission levels to be copied and press the Copy button in the ribbon.
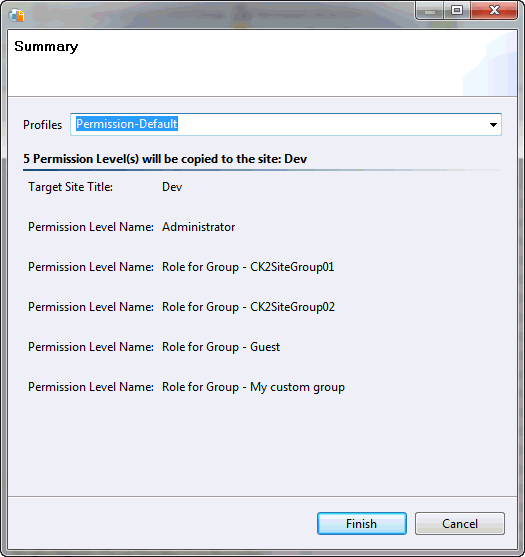
4.Similar to the procedure in Step 1 and 2 above select the target object.
5.Click the Paste button from the ribbon.
6.In the provide window, confirm that information and select the appropriate options.
7.Click Finish to begin the operation
Remove Permission Level
Security Manager allows administrators to remove Permission Level(s) using a single operation.
1.Select a site from the Navigation area where the group(s) is located.
2.Press the Permission Levels button to view a list of available levels.
3.Select the level(s) that need to be removed
4.Press the Del key (or from the right-click menu select the Delete option).
5.In the provided window, confirm the delete operation.
6.Press OK to begin the operation.
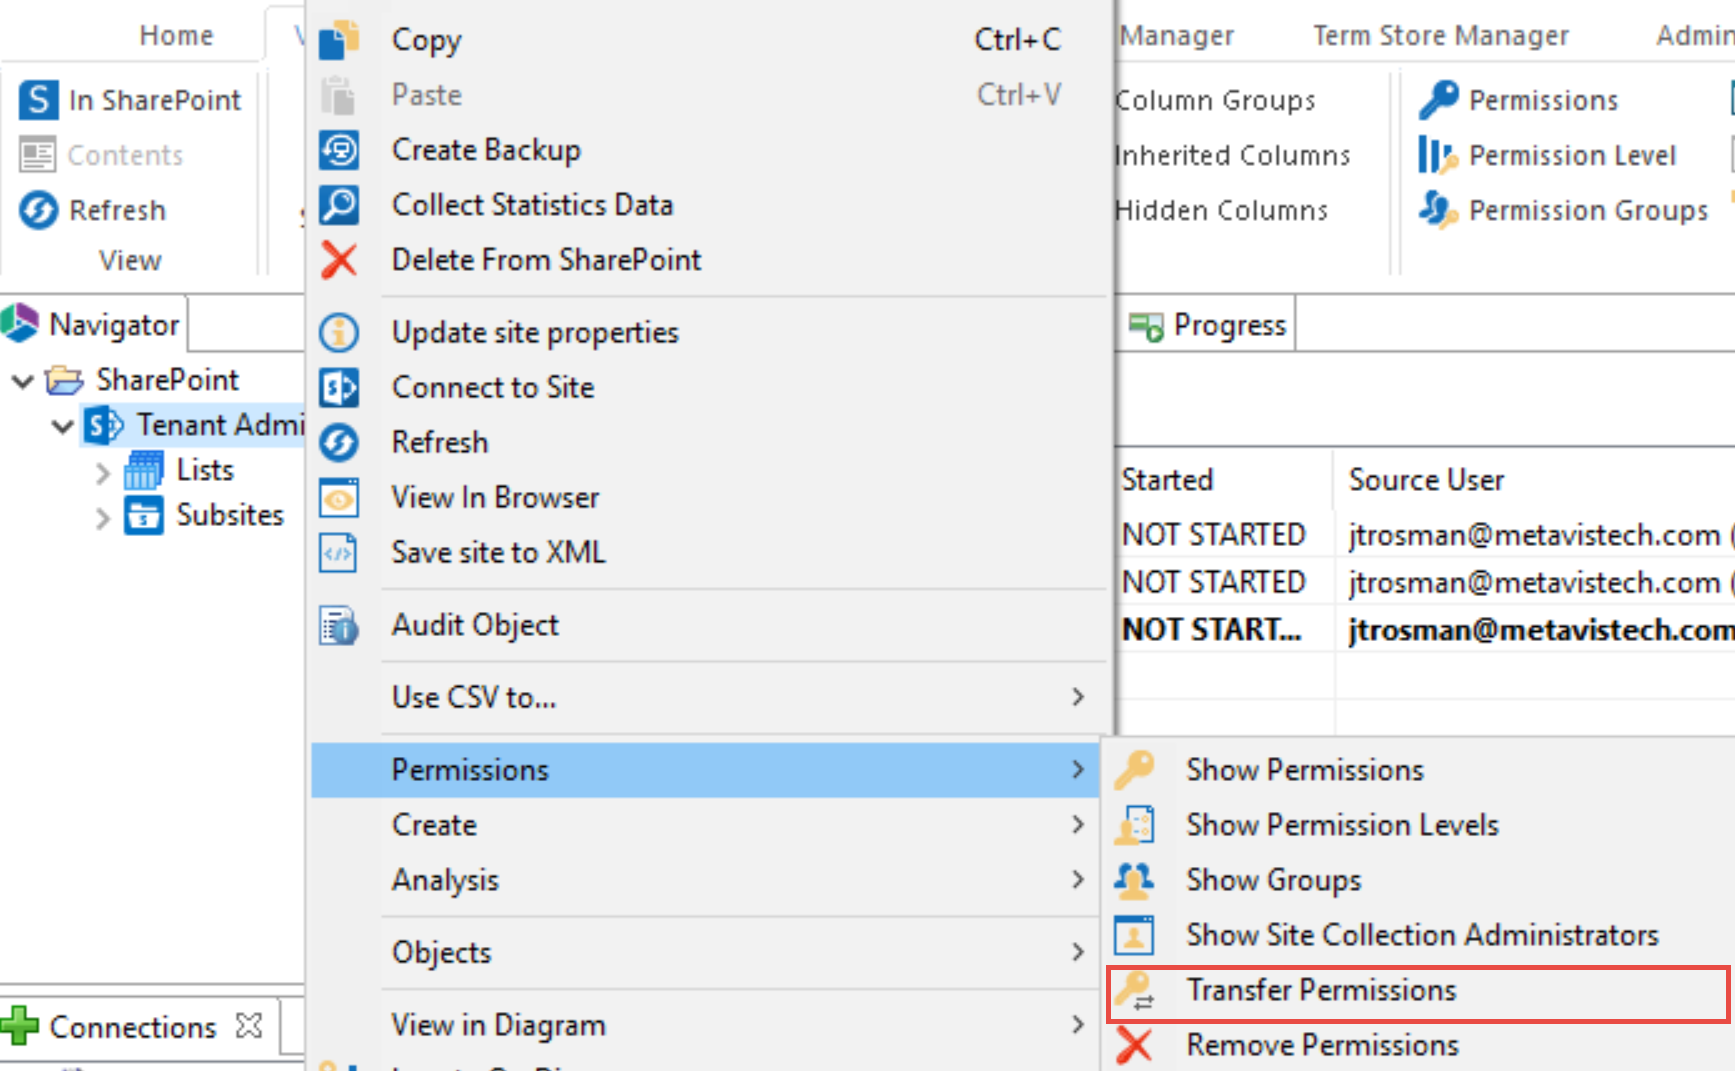
Transfer Permissions
Transferring permissions can be down by right clicking on a SharePoint site or user and selecting Permissions and then Transfer Permissions.
1.Enter your credentials if prompted for them.
2.In the Clone/Transfer Permissions Wizard, select whether you would like to manually enter the source and target users, or you can choose to transfer users using a user-mapping file.
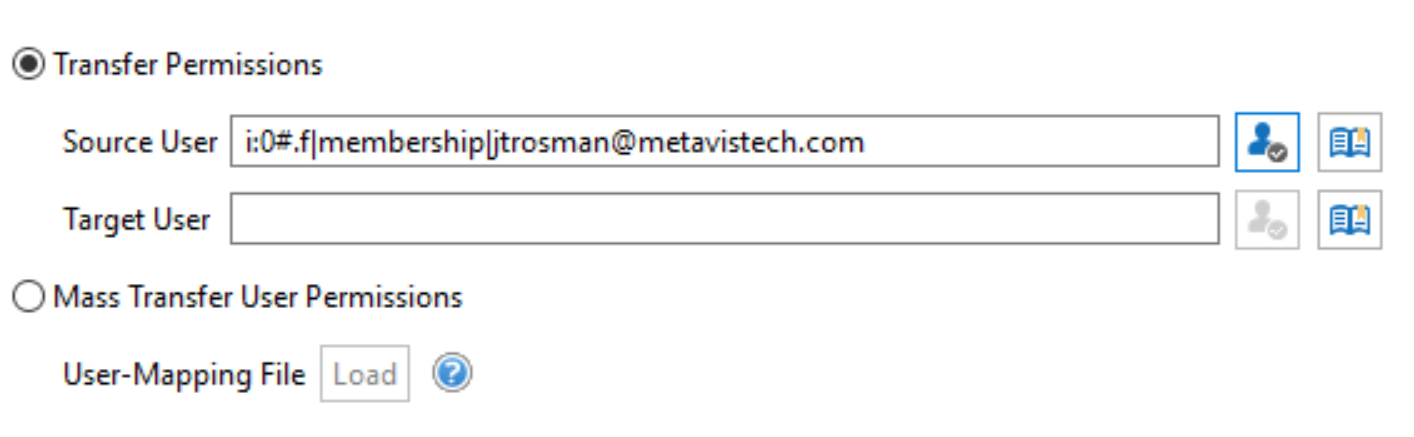
3.If you chose to manually enter users, be sure to select the Check Names button next to both source and target fields, to confirm that they are valid users.

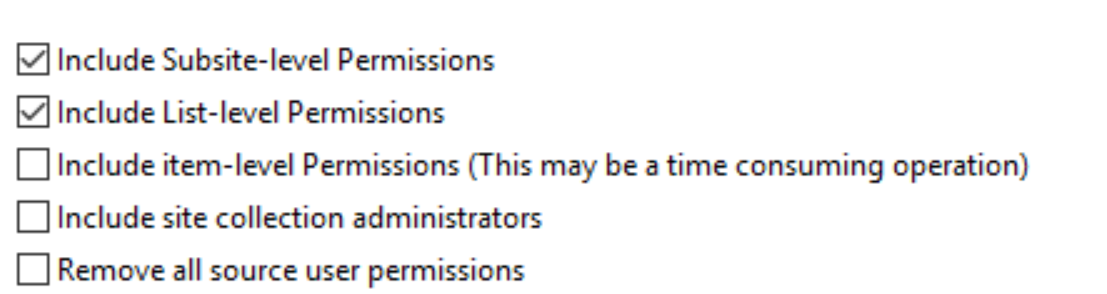
4.Select which which permission options you would like to include in the transfer.
5.Select Finish to start the transfer.