Columns for Copying SharePoint Content Using CSV
1.Source SharePoint Site - Identifies the source site for the content to be copied
2.Source SharePoint List - Identifies the source list for the content to be copied
3.Source SharePoint File - Identifies the source name for the content to be copied
4.Target SharePoint Site - Identifies the target site for the content to be copied. This field is left blank by default but may be entered to copy content to different sites and lists using the same CSV file.
|
|
NOTE: In order to take advantage of this feature the CSV file must be copied on a site not a list level. |

5.Target SharePoint List - Identifies the target list for the content to be copied
6.SharePoint File Name - Identifies the target SharePoint item name for the content to be copied ("/" is used to identify folders)
7.Content Type - Identifies the SharePoint content type for the content to be copied.
|
|
NOTE: This content type should already exist within the target SharePoint list and must be spelled exactly the same way to avoid errors. If the field is multi-value enabled and you wish to apply two or more, please separate each value with a pipe character and a trialing space. For example, if I wanted to apply the terms Apple and Orange to a managed metadata column here is how it would look in the CSV file: Apple| Orange . That is "Apple" pipe character space "Orange". |
8.Custom Fields - Any custom fields would be listed following the content type.
|
|
NOTE: These fields must already exist within the target SharePoint list (and content Type). The values entered here must also pass any SharePoint validation or restrictions for the corresponding field. |
9.Created At - Identifies the content creation date. If left blank the value will be set to the current date and time.
10.CSV ID Col - This is a reserved field utilized for incremental copy functionality. Do not enter anything into this field.
11.Modified At - Identifies the last content modification date. If left blank the value will be set to the current date and time.
12.Created By - Identifies the user who created the content. If left blank the value will be set to the user currently logged into SharePoint.
13.Modified By - Identifies the user who last modified the content. If left blank the value will be set to the user currently logged into SharePoint.
14.Mark Version - For versioned libraries, identifies the version level for the item being imported. If left blank, the default version level will be used during import.
15.Version Comment - Specifies the comment that will be used when importing items
Columns for Copying E-Mail and Public Folder Objects using CSV
1.Item Name - Generally this is the subject of the e-mail
2.Outlook Path - Identifies the location of the e-mail in the source
3.Entry ID - This is a reserved field.
4.Target SharePoint Site - Identifies the target site for the file listed in the source file column. The field is left blank by default but may be specified to upload content into different sites and lists using the same CSV file.
|
|
NOTE: In order to take advantage of this feature the CSV file must be uploaded on a site not a list level. |
5.Target SharePoint List - Identifies the target list for the import
6.SharePoint File Name - Identifies the SharePoint item name that will be used for the import ( "/" is used to identify folders)
7.Content Type - Identifies the SharePoint content type that will be used for the import.
|
|
NOTE: This content type should already exist within the target SharePoint list and must be spelled exactly the same way to avoid errors. |
8.Custom Fields - Any custom fields would be listed following the content type.
|
|
NOTE: These fields must already exist within the target SharePoint list (and content Type). The values entered here must also pass any SharePoint validation or restrictions for the corresponding field. |
9.Created At - Identifies the content creation date which is extracted from the file system. If left blank the value will be set to the current date and time.
10.CSV ID Col - This is a reserved field utilized for incremental copy functionality. Do not enter anything into this field.
11.Modified At - Identifies the last content modification date which is extracted from the file system. If left blank the value will be set to the current date and time.
12.Created By - Identifies the user who created the content. If left blank the value will be set to the user currently logged into SharePoint.
13.Modified By - Identifies the user who last modified the content. If left blank the value will be set to the user currently logged into SharePoint.
14.Mark Version - For versioned libraries, identifies the version level for the item being imported ("Major" or "Minor"). If a quasi-versioning system was used in the file system, this field along with the SharePoint File Name can be used to recreate the versions in SharePoint. In order to implement this functionality, use the same file name in the SharePoint File Name field and then specify the appropriate version level in this field. If left blank, the default version level will be used during import.
15.Version Comment - Specifies the comment that will be used when importing items
|
|
NOTE: When copying/tagging a library with versioned documents, using the csv option will apply the information entered for the file to each of the versions. If your versions contain unique information, you will want to put the following mapping command in the column that contains unique information on the versions: where "SOURCE" is the display name of the column. |
Experience Data
Essentials for Office 365 submits user experience data to our internal telemetry servers. This information is used by management to better understand how the software is being used for the sole purpose of product planning and development.
The information collected includes, but is not limited to:
·Software version
·Framework version
·Operating System
·SharePoint version
·Session data
·Activated software license key
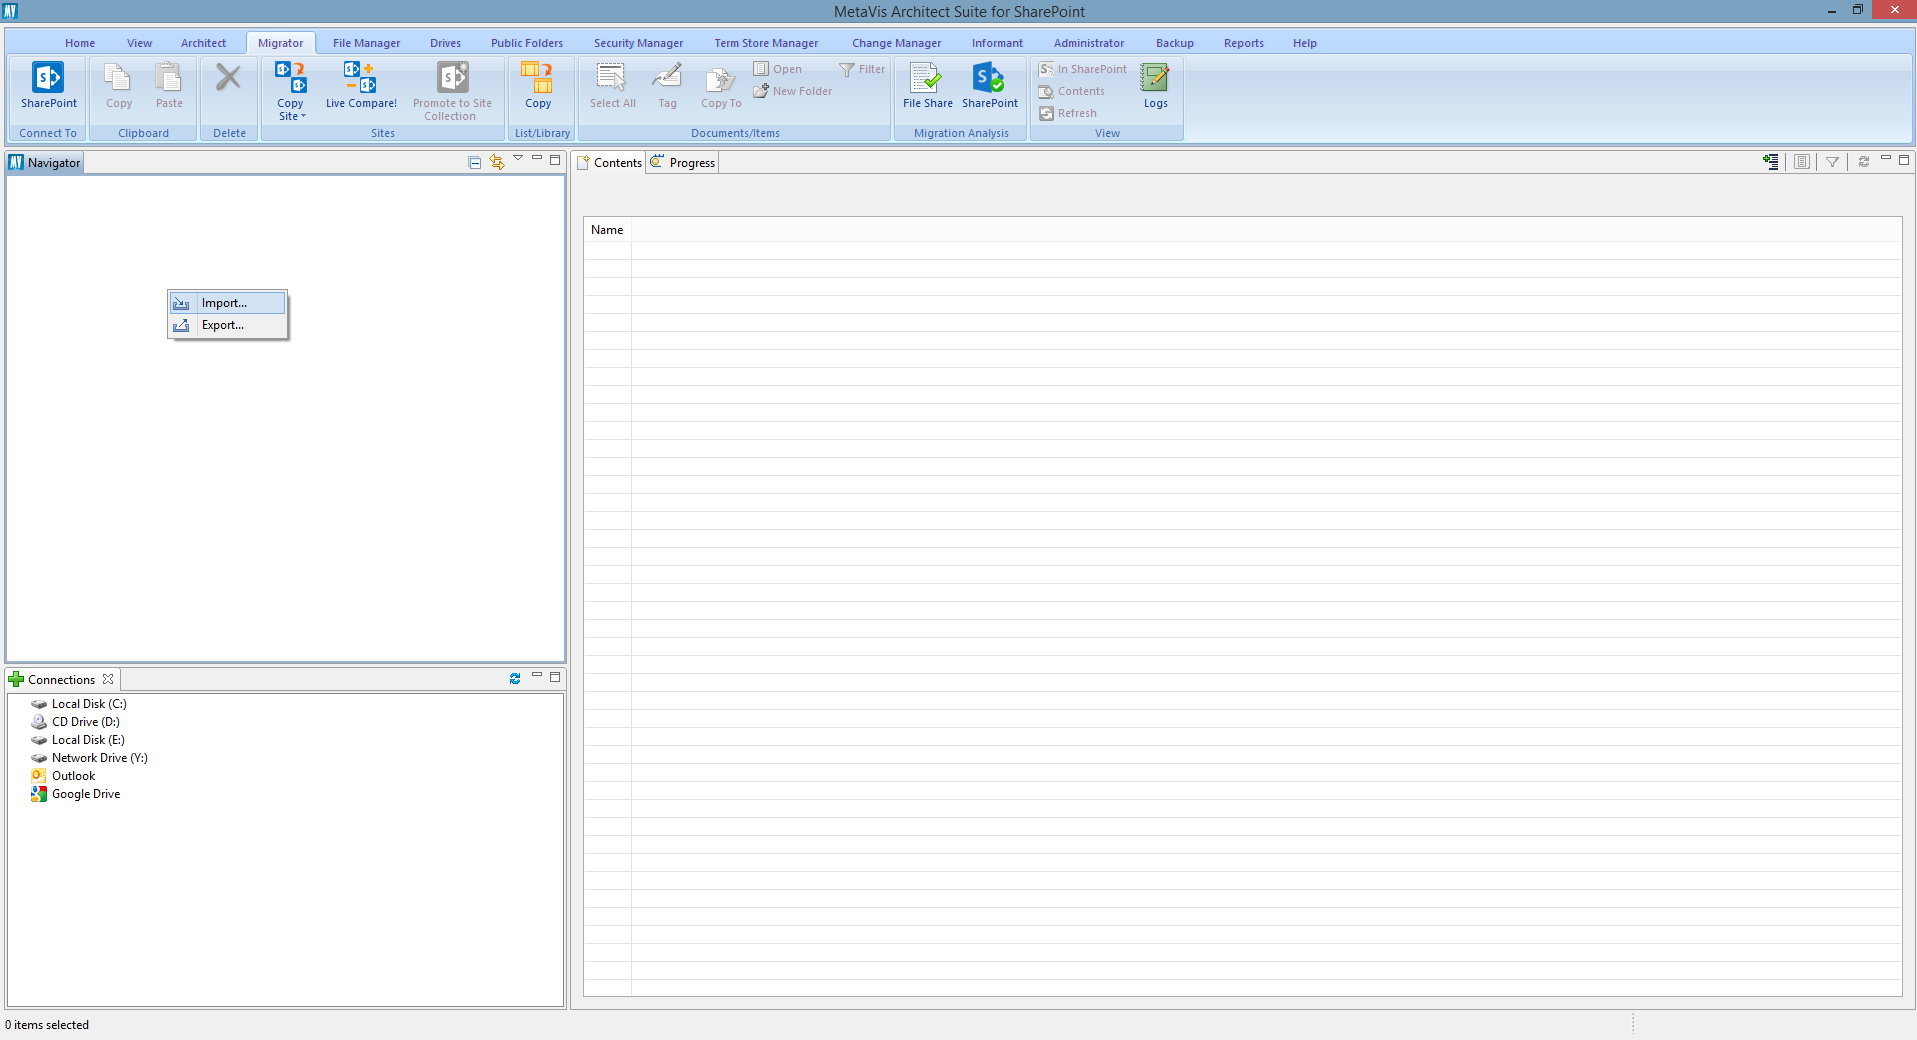
How to Import Projects into Metalogix Essentials for Office 365
Importing projects into a workplace is useful if you want to move a project between installations of Metalogix. This operation connects Metalogix with the project folder that is generated when you connect to a site collection, farm, or tenant. It can also import collected data projects, google drives and backups.
1.Right Click in the Navigation pane and select 'Import'.
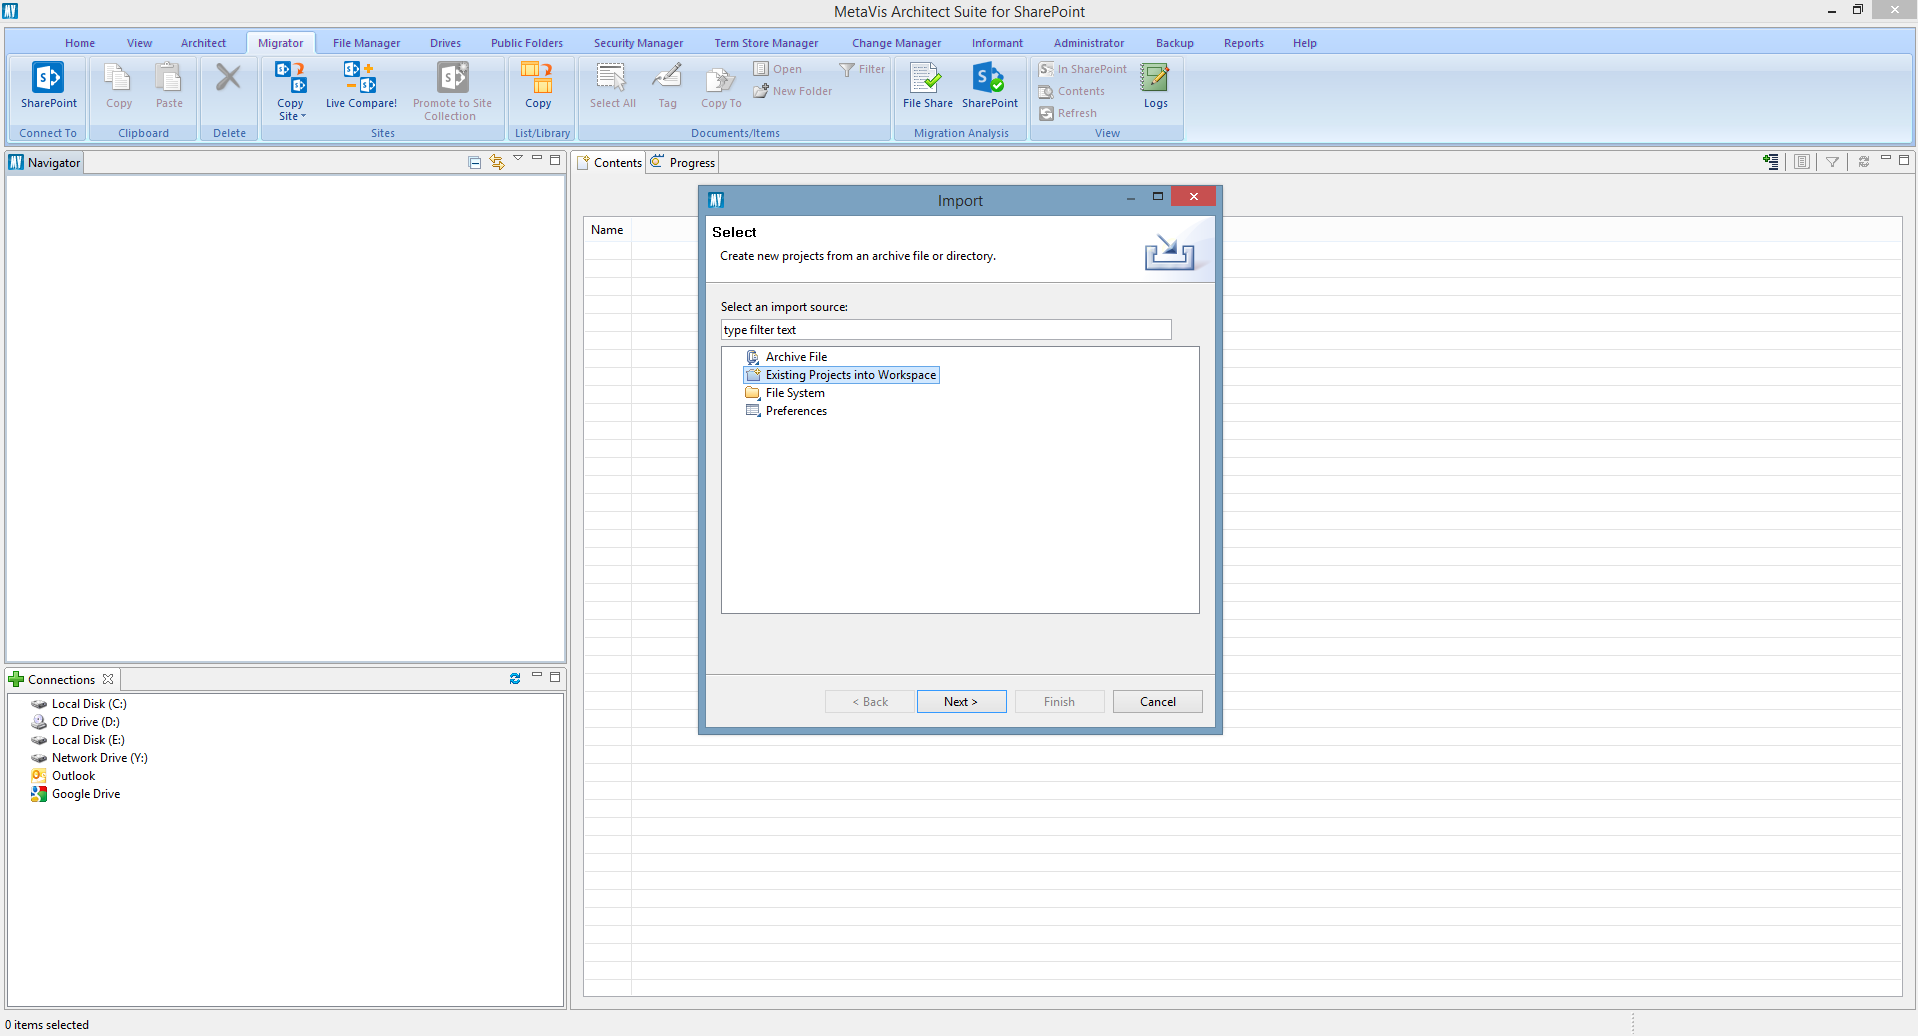
2.Pick 'Existing Projects into Workplace'.
3.Select the 'Browse' button next to 'Select root directory'.
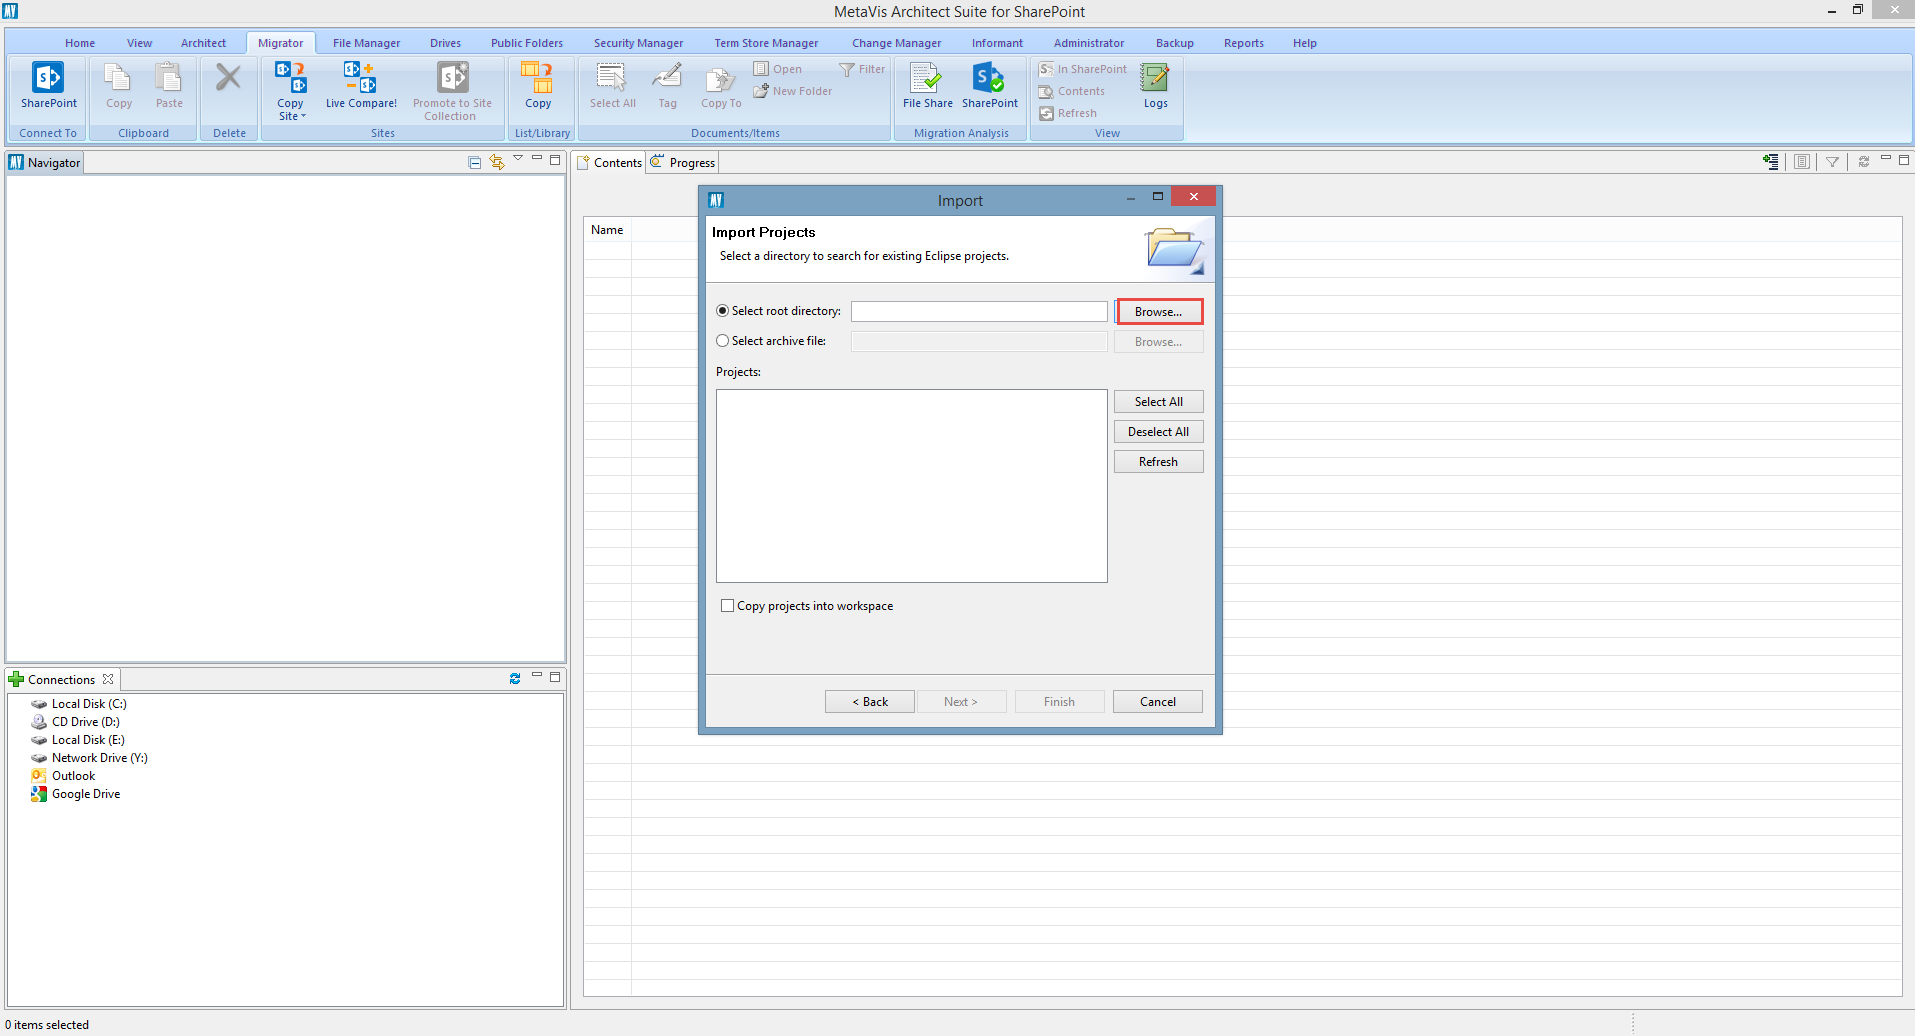
4.Select the folder that you want to import the projects from.

5.Select the projects that you want to import. If you check the 'Copy Projects into Workplace' Metalogix will copy the projects from wherever they are into the current Metalogix workspace folder. Sometimes it makes sense to have a reference to an external project, such as when you have a Backup and sometimes it makes sense to copy the files into the new workplace so that you have all your projects in one place rather than linking back to the original location.
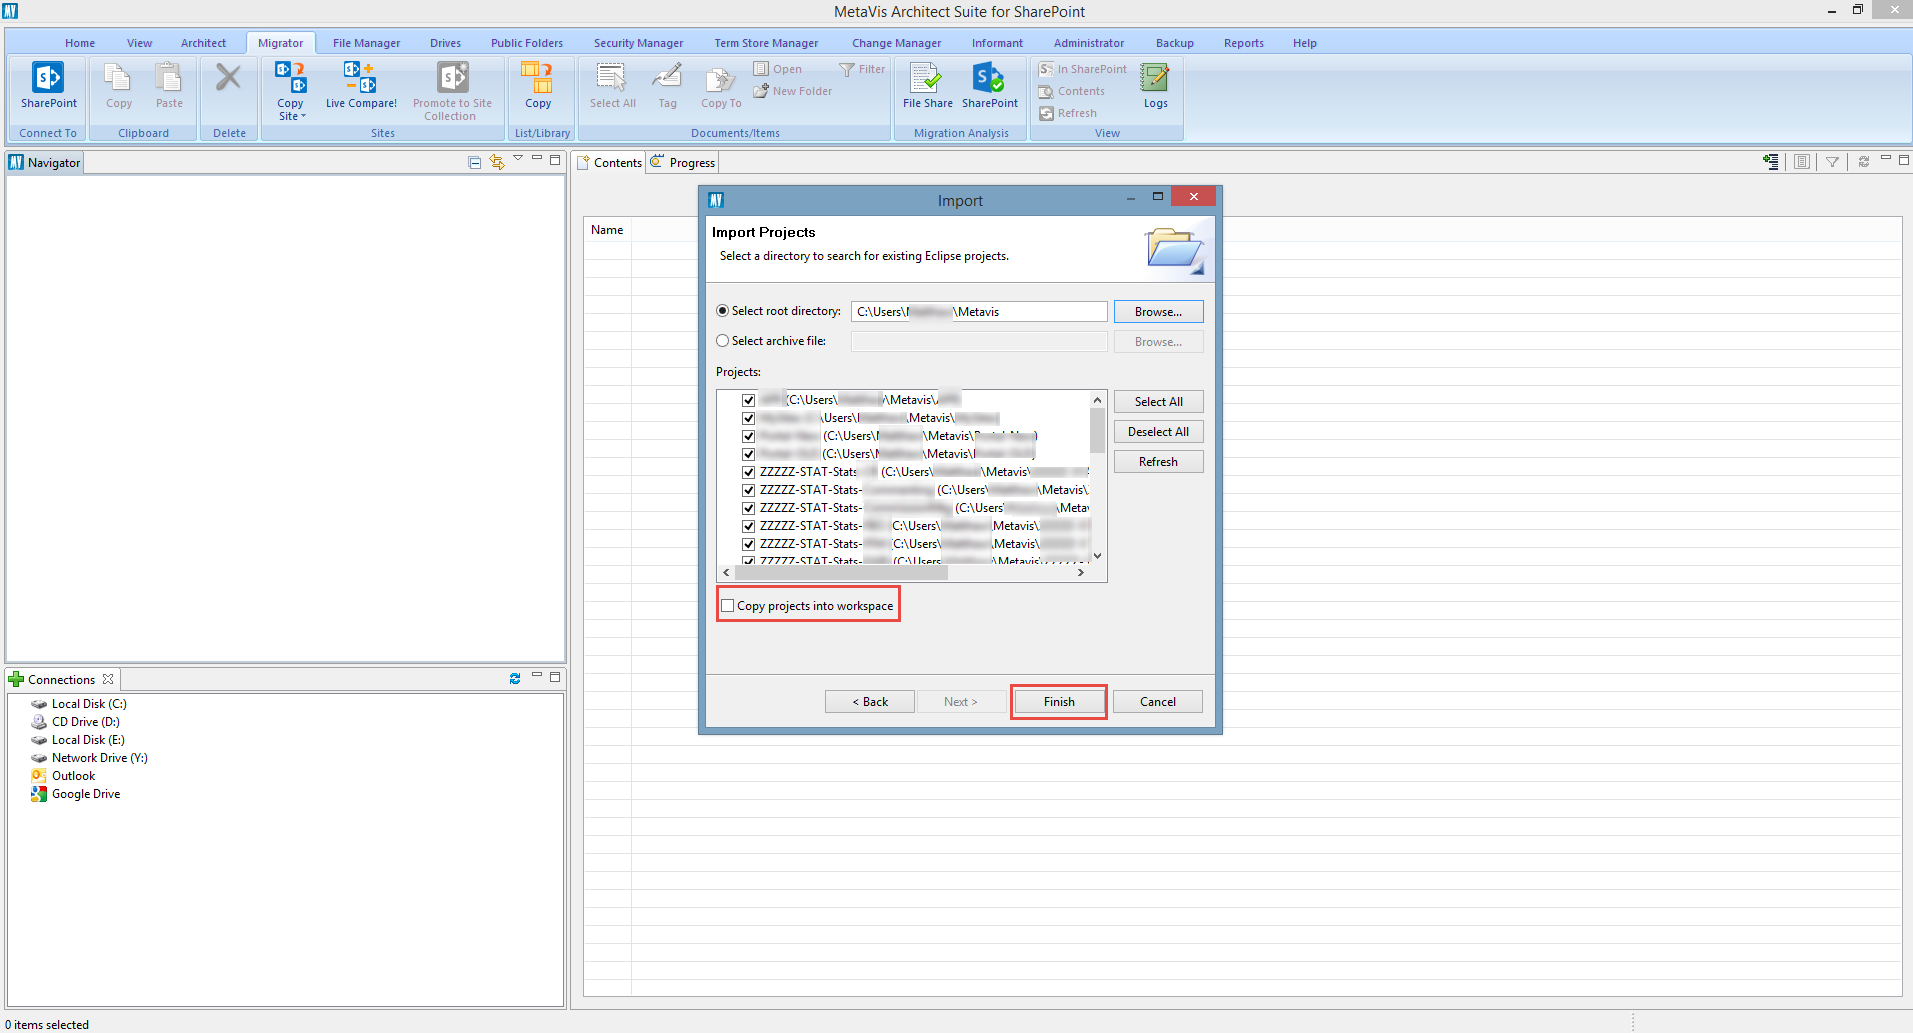
6.Your projects should now be imported in the Navigator pane.