
Caringo CAStor
To create a store:
1.Open the Configuration tool from Start > Metalogix > Archive Manager Configuration or C:\Program Files (x86)\Common Files\PAM\PAMConfig\PAMConfig.exe
2.Select HSM from the features panel.
3.Click the Stores tab.
4.Click New Store from the Stores section. The Create a new Media Store wizard starts.
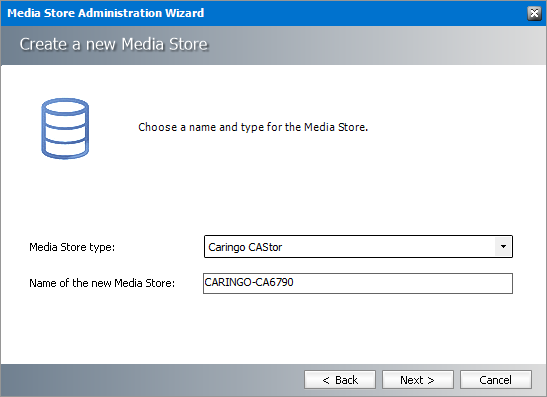
Enter the information as described below:
a.Media Store Type - select Caringo CAStor from the drop down list.
b.Name of the new Media Store - enter a unique name for this store.
5.Click Next. The Media Store Administration Wizard step for Caringo CAStor opens.
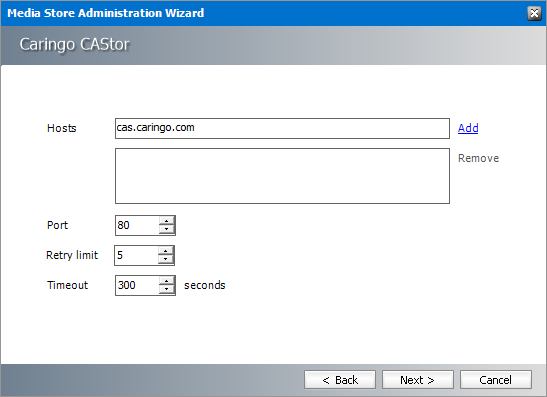
Enter the information as described below:
a.Hosts -enter your specific host name and click Add to add the host name to the hosts list. A host can be also removed from the list by selecting it and clicking Remove.
b.Port - set the port for communication with the cloud.
c.Retry limit - specify how many times the store should try to save a file.
d.Timeout - set the server connection timeout (in seconds).
6.Click Next.

Enter the information as described below:
a.Relative speed of the store - the relative speed of this store compared to other stores.
b.Use HSM Cache for read operations - select this check box to allow HSM to use its internal cache to copy files during read operations.
c.Write protection (mark as read only) - not supported for this store type.
d.Re-create service for this Media Store - not supported for this store type.
7.Click Finish.
8.Restart HSM services.
9.Verify that the media store appears in the Stores section.
10.Create a Schema for this media store.
Google Drive
|
|
NOTE: To use a Google Drive store, the .NET Framework 4.5 must be installed on the HSM Server. If you install the .NET Framework after installing HSM, you must run the HSM setup once more in the Repair mode to be able to access the Google Drive. |

To create a store:
1.Open the Configuration tool from Start > Metalogix > Archive Manager Configuration or C:\Program Files (x86)\Common Files\PAM\PAMConfig\PAMConfig.exe
2.Select HSM from the features panel.
3.Click the Stores tab.
4.Click New Store from the Stores section. The Create a new Media Store wizard starts.

Enter the information as described below:
a.Media Store Type - select Google Drive from the drop down list.
b.Name of the new Media Store - enter a unique name for this store.
5.Click Next. The Media Store Administration Wizard step for the Google Drive opens.

Enter the information as described below:
a.Root Folder - the default root folder is already entered for you. You can change it if necessary.
b.Client Id - Access key configured in Hitachi HCAP instance.
c.Client Secret - Secret key configured in Hitachi HCAP instance.
|
|
NOTE: To create the Client ID and Client Secret: 1.Login to the Google Developers console at https://console.developers.google.com/project 2.Create a new project. 3.Expand APIs & auth in the left pane and select APIs. 4.Activate the following APIs: Drive API. 5.Select Credentials from the left pane. 6.Under the OAuth section, click Create new Client ID. 7.Select Installed application, then click Create Client ID. |
6.Click Authorize access to your Google account.
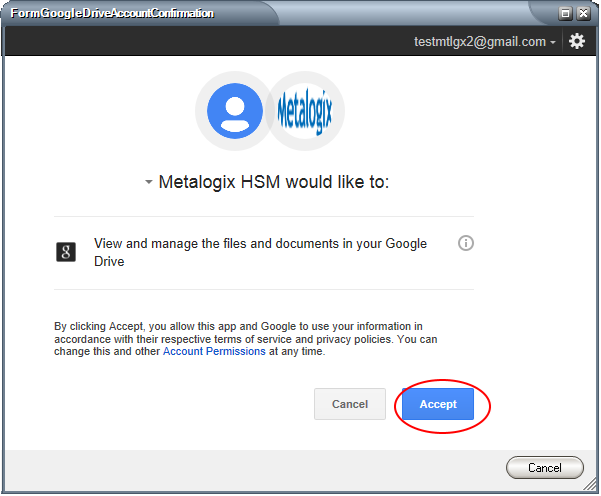
7.Click Accept. If your credentials were correct, a confirmation message appears.
8.Click Next.

Enter the information as described below:
a.Relative speed of the store - the relative speed of this store compared to other stores.
b.Use HSM Cache for read operations - select this check box to allow HSM to use its internal cache to copy files during read operations.
c.Write protection (mark as read only) - not supported for this store type.
d.Re-create service for this Media Store - not supported for this store type.
9.Click Finish.
10.Restart HSM services.
11.Verify that the media store appears in the Stores section.
12.Create a Schema for this media store.
EMC Atmos
To create a store:
1.Open the Configuration tool from Start > Metalogix > Archive Manager Configuration or C:\Program Files (x86)\Common Files\PAM\PAMConfig\PAMConfig.exe
2.Select HSM from the features panel.
3.Click the Stores tab.
4.Click New Store from the Stores section. The Create a new Media Store wizard starts.
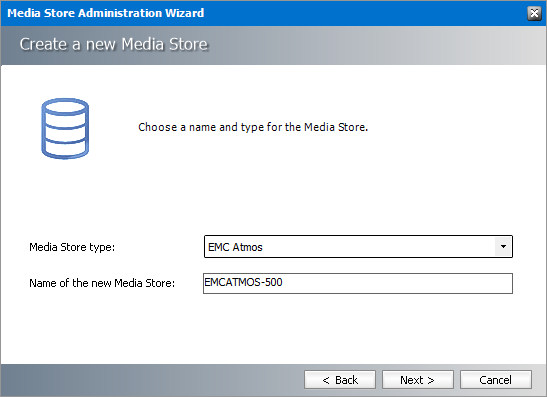
Enter the information as described below:
a.Media Store Type - select EMC Atmos from the drop down list.
b.Name of the new Media Store - enter a unique name for this store.
5.Click Next. The Media Store Administration Wizard step for the EMC Atmos opens.
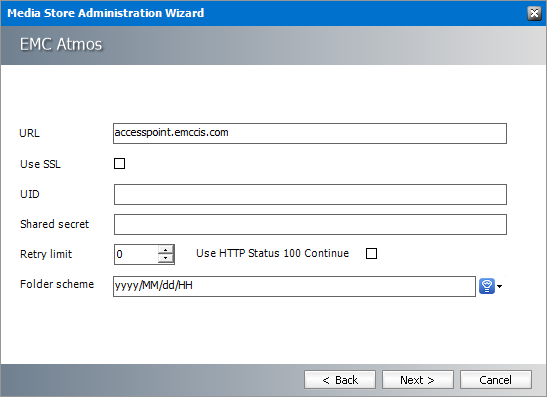
Enter the information as described below:
a.URL - FQDN or IP address of the EMC Atmos server.
b.Use SSL - select this check box to use SSL as the communication protocol.
c.UID - username to access the EMC Atmos instance
d.Shared Secret - Secret key configured in the EMC Atmos instance.
e.Retry limit - set how many times the store should attempt to save a file.
f.Use HTTP Status 100 Continue - select this check box for request header when creating or updating namespace objects.
g.Folder scheme - a unique prefix that you can create for each item stored in the media store. To construct a date type prefix, click 
6.Click Next.
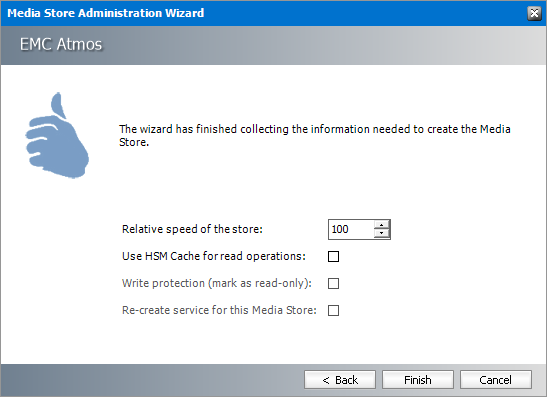
Enter the information as described below:
a.Relative speed of the store - the relative speed of this store compared to other stores.
b.Use HSM Cache for read operations - select this check box to allow HSM to use its internal cache to copy files during read operations.
c.Write protection (mark as read only) - not supported for this store type.
d.Re-create service for this Media Store - not supported for this store type.
7.Click Finish.
8.Restart HSM services.
9.Verify that the media store appears in the Stores section.
10.Create a Schema for this media store.
Microsoft Azure
Azure Blob Storage is the Microsoft object storage solution for the cloud.
To create a store:
1.Open the Configuration tool from Start > Metalogix > Archive Manager Configuration or C:\Program Files (x86)\Common Files\PAM\PAMConfig\PAMConfig.exe
2.Select HSM from the features panel.
3.Click the Stores tab.
4.Click New Store from the Stores section. The Create a new Media Store wizard starts.
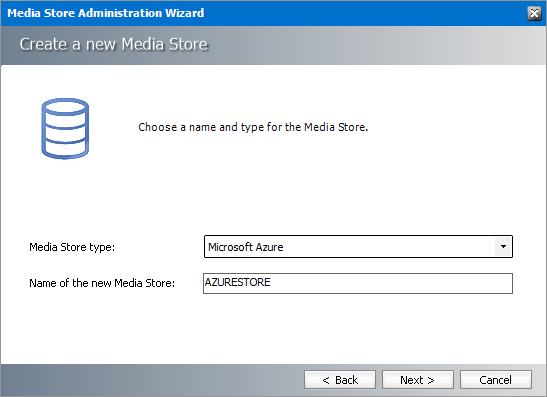
Enter the information as described below:
a.Media Store Type - select Microsoft Azure from the drop down list.
b.Name of the new Media Store - enter a unique name for this store.
5.Click Next. The Media Store Administration Wizard step for the Microsoft Azure opens.
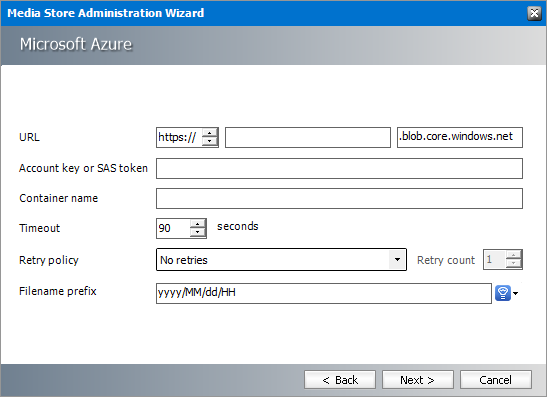
Enter the information as described below:
a.URL - the base address for the objects in your storage account that is the combination of the account name and the Azure Storage blob endpoint forms. You can enter the account name in the field and change the protocol between http or https.
b.Account key or SAS token - the account key for your storage account. You can use either of the two keys to access Azure Storage, but in general it's a good practice to use the first key, and reserve the use of the second key for when you are rotating keys. You can also use a shared access signature (SAS) which is a URI that grants restricted access rights to Azure Storage resources. You can provide a shared access URI to clients who should not be trusted with your storage account key but whom you wish to delegate access to certain storage account resources. By distributing a SAS URI to these clients, you grant them access to a resource for a specified period of time.
c.Container name - name of the container that you have created to organizes the set of blobs, similar to a directory in a file system.
d.Timeout - Set the server connection timeout (in seconds).
e.Retry policy - choose the behavior from the available options.
f.Retry count - set how many times the store should try to save a file.
g.Filename prefix - a unique prefix that you can create for each item stored in the media store. To construct a date type prefix, click
6.Click Next.

Enter the information as described below:
a.Relative speed of the store - the relative speed of this store compared to other stores.
b.Use HSM Cache for read operations - select this check box to allow HSM to use its internal cache to copy files during read operations.
c.Write protection (mark as read only) - not supported for this store type.
d.Re-create service for this Media Store - not supported for this store type.
7.Click Finish.
8.Restart HSM services.
9.Verify that the media store appears in the Stores section.
10.Create a Schema for this media store.
To test you Azure connection data, go to https://www.myazurestorage.com and enter the account name and account key. Under the BLOBs menu you will see your stored files under a container.