
Remote HSM Server
In case of a remote HSM Server, i.e. if the HSM Server is installed on a separate machine, it is necessary that:
a)the HSM Base service runs under the Archive Manager super-user account
b)DCOM Rights are reduced
a)The Archive Manager super-user account is an account under which our MAM services (MAMfsaHandlerSv, MAMfsaRemoteSV, MAMfsaArchiverSv) run on the Archvie Manager server.
On the HSM server, follow these steps:
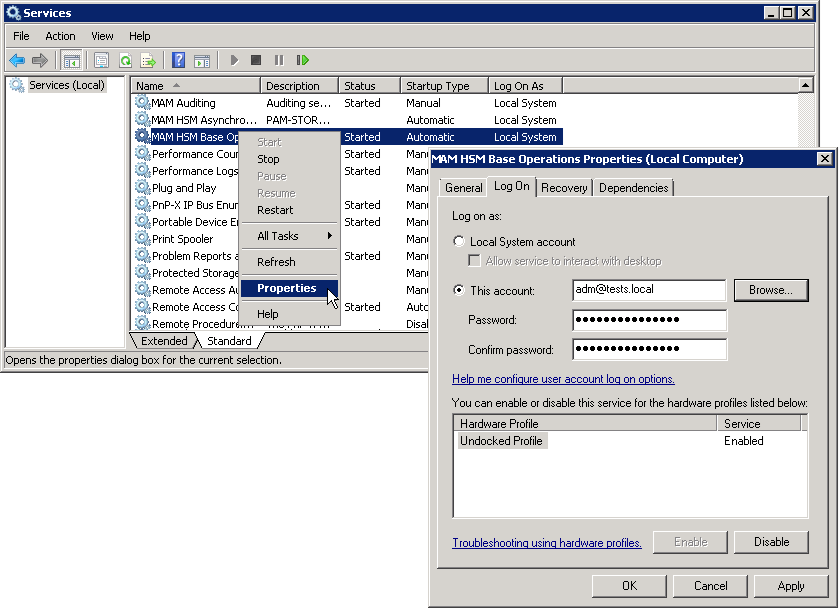
1.Open Start / Administrative tools / Services and locate the MAM HSM Base Operations service.
2.Right-click it and open its Properties. On the Log On tab check This account option and enter the super-user account with its password. (Super-user account is an account which our MAM services (MAMfsaHandlerSv, MAMfsaRemoteSV, MAMfsaArchiverSv) run under.)
Finally click OK.
b)DCOM Rights has to be reduced in two locations to
AuthenticationLevel=None
ImpersonationLevel=Anonymous
and after that the IIS have to be reset.
On the HSM Server follow these steps:
1.Open machine.config from:
C:\WINDOWS\Microsoft.NET\Framework\v2.0.50727\CONFIG\machine.config
In case the 64-bit .NET FrameWork open:
C:\WINDOWS\Microsoft.NET\Framework64\v2.0.50727\CONFIG\machine.config
2.Locate the entry for processModel and add:
comAuthenticationLevel="None" comImpersonationLevel="Anonymous"
The entry then looks as follows:
<processModel autoConfig="true" comAuthenticationLevel="None" comImpersonationLevel="Anonymous" />
3.Close the config.
4.Now run Component Services (click Start /Settings /Control Panel /Administrative Tools /Component Services).
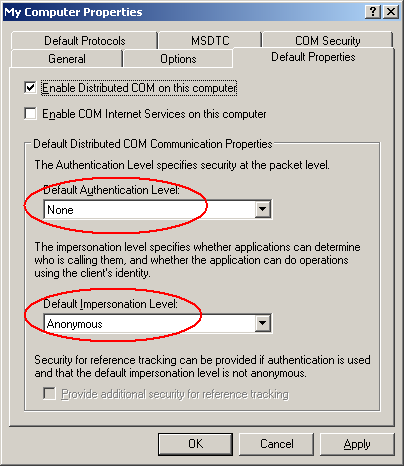
5.In the Component Services window expand the Component Services tree down to Component Services \Computers \My Computer and then right-click My Computer to open its Properties window.
6.Switch over to the Default permissions tab. Check Enable Distributed COM on this computer. Then in the Default Authentication Level dropdown box select None and in the Default Impersonation Level select Anonymous.
Click Apply, then OK.
7.Finally reset IIS.
HSM configured for Windows Server firewall
Active Firewall on the remote HSM server can cause issues at file retrieving from the archive. To avoid it, the HSM has to be configured properly.
Here are the steps you have to do on Windows Server 2012 / 2016 / 2019 hosting HSM while the Firewall is turned on:
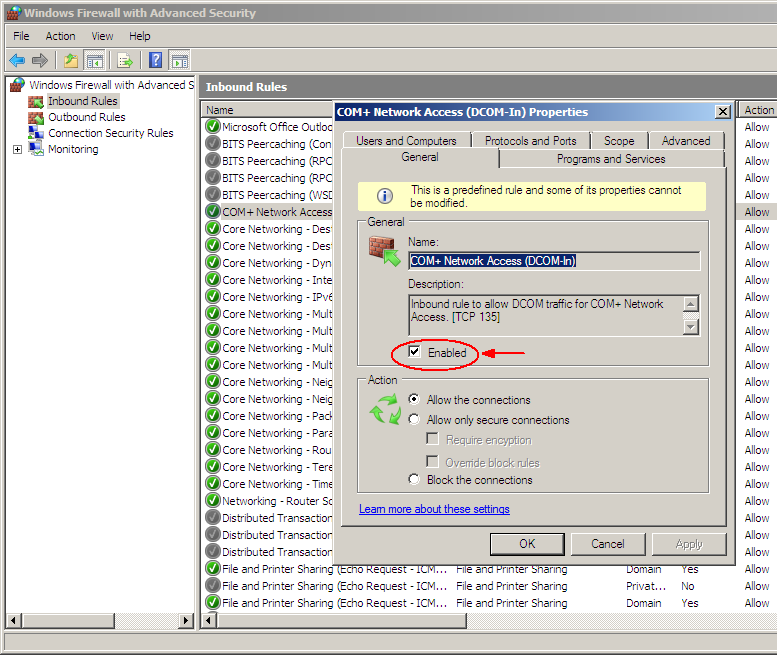
1.You need to allow DCOM traffic for COM+ Network Access. Open Start / Programs / Administrative tools / Windows Firewall. In the Windows Firewall under Inbound Rules locate COM+ Network Access and right-click it to open its Properties. On the General tab check Enable and then click OK.
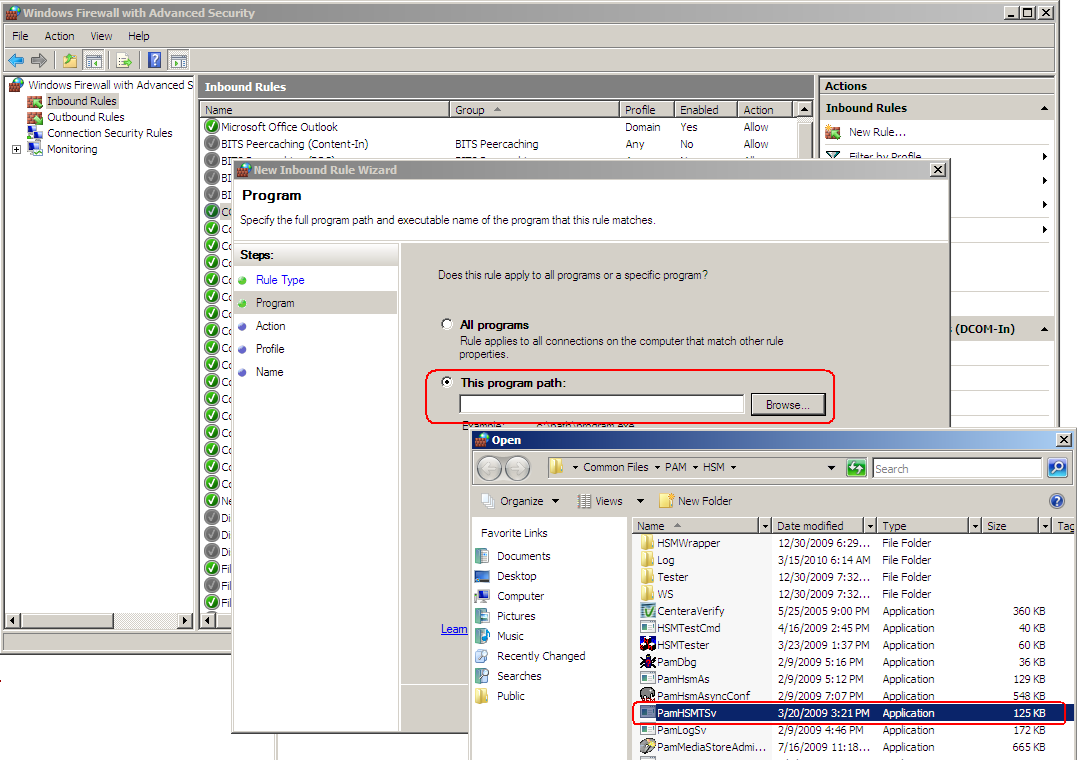
2.Now create a New Inbound Rule. To do so, click the New Rule in the right upper corner. The wizard opens. Select Program and click Next.
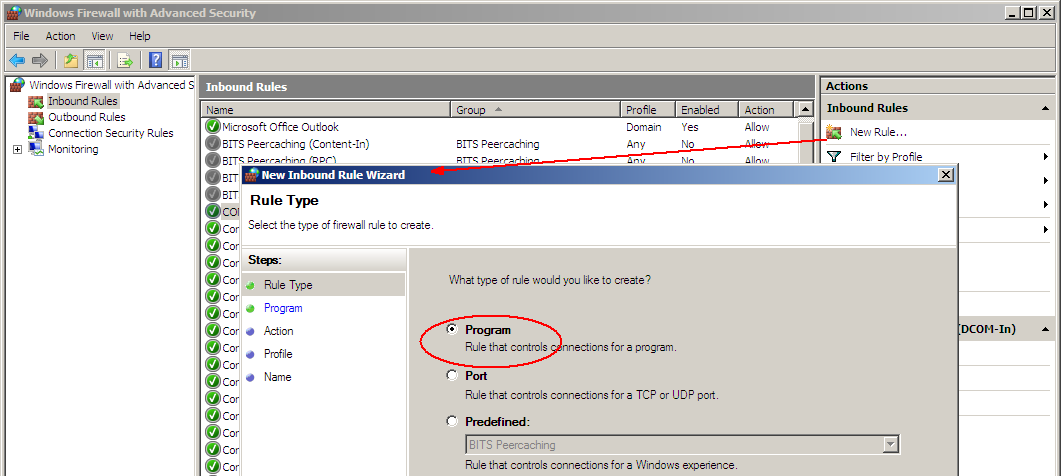
3.On the next page select This program path and browse <installDir>\Common Files\PAM\HSM\PamHSMTSv. Click Next.
4.Select Allow the connection and click Next. Then click Next again.
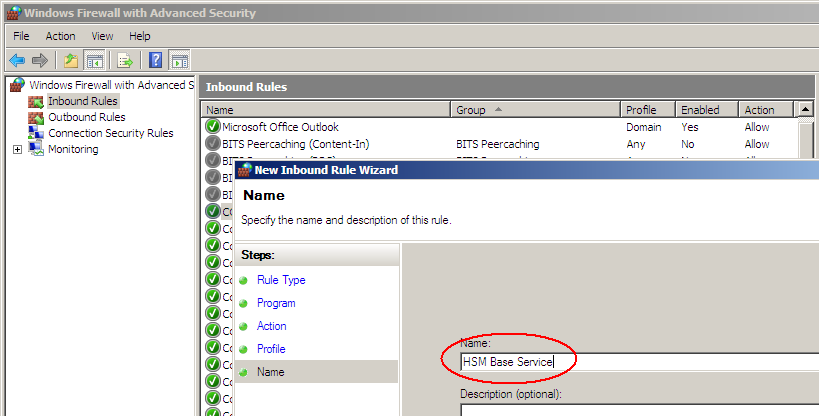
5.On the next page name it e.g. HSM Base Service and click Finish.
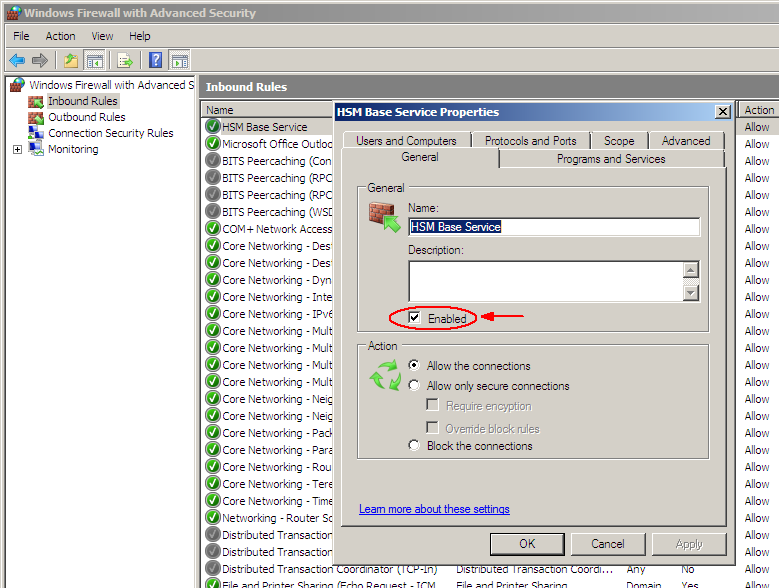
6.Open the Properties of the new created Inbound Rule and on the General tab click Enable. Then click OK.
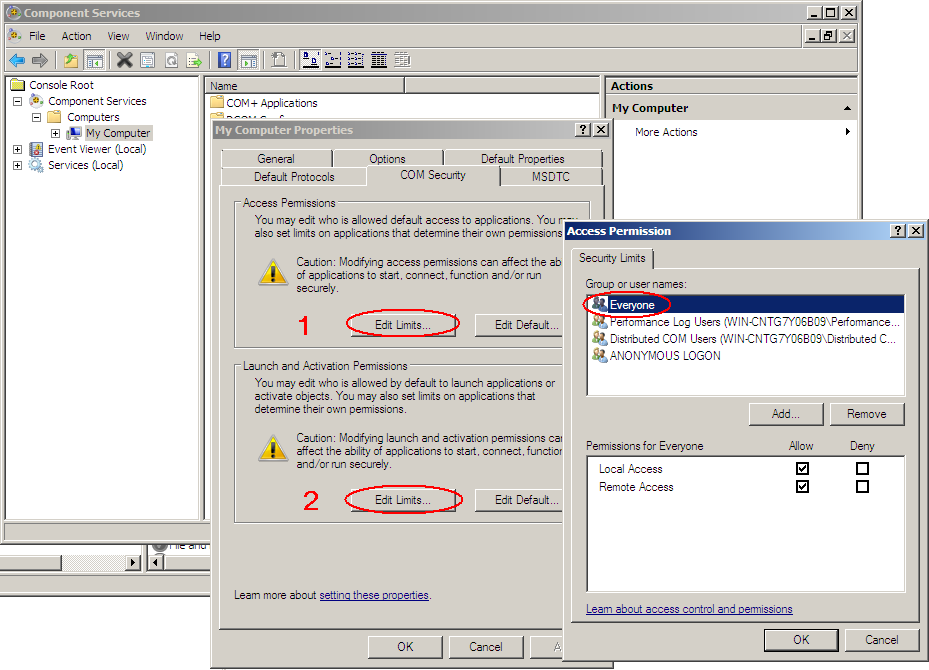
7.Now allow Remote Access and Remote Activation for Everyone in DCOMs. To do so, open Component Services (e.g. unfold the tree down to Component Services \ Computers \ My Computer). Open My Computer Properties. On the COM Security tab:
·In the Access Permissions section click Edit Limits. In the pop-up dialog make sure to select Remote Access for Everyone. Finish by clicking OK.
then
·In the Launch and Activation Permission section click Edit Limits. In the pop-up dialog make sure to select Remote Activation for Everyone. Finish by clicking OK.
8.Finally, you can test the connection with HSM tester from the Archive Manager Server.