Migrate and Navigate
Dashboard
How do I navigate to the project dashboard?
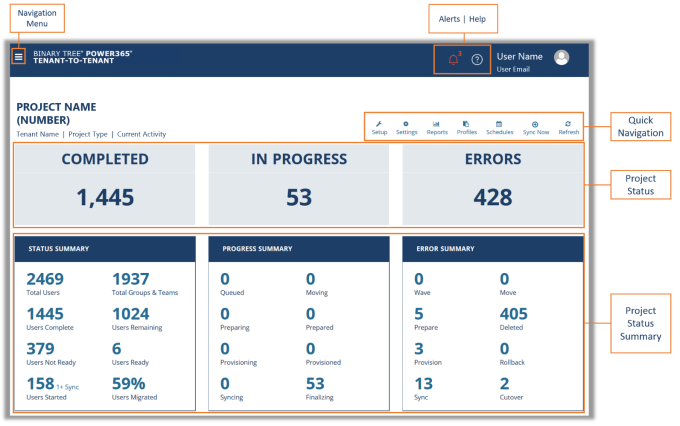
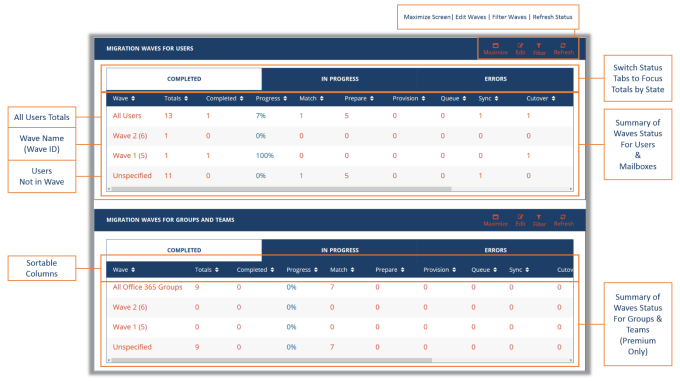
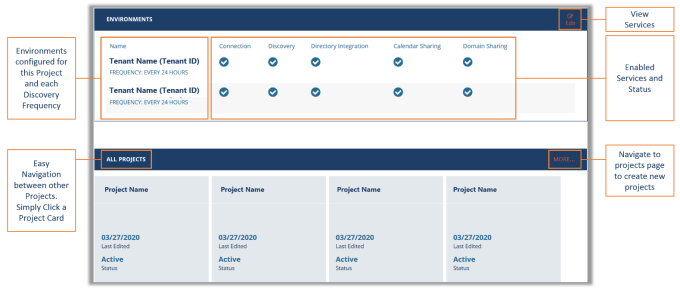
The project dashboard includes overall project status statistics and summary sections covering project status, progress, errors, and migration waves. The dashboard also includes sections to quickly view the status of enabled services and other projects. Quick navigation icons are available at the top of the dashboard to go directly to project setup, settings, reports, profiles, and schedules info as well as syncing and refresh functions. Names and figures can be clicked on to view more detailed information for each item.
Does each project have its own dashboard?
Yes. Each project has its own dashboard. The project's name and number appears in the upper left of the dashboard. To change to another project’s dashboard, select "Projects" in the navigation menu or click a project in the All Projects section.
How do I use the project dashboard?
A visual guide to the features of the project dashboard are presented in the images below. Click on a image to enlarge the image.
Figure 1: Example Dashboard (Top) Project Status
Figure 2: Example Dashboard (Middle) Status by Waves
Figure 3: Example Dashboard (Bottom) Services and Projects
Additional Information
Videos
Menus
What menus are available?
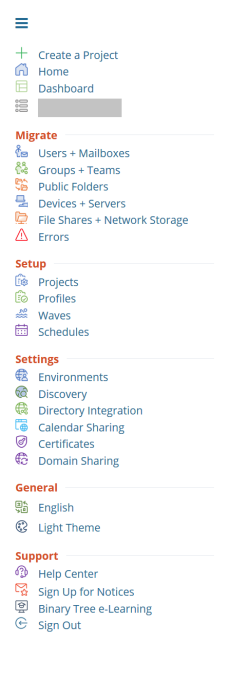
Power365 consists of two (2) menus. The left navigation menu which is sometimes referred to as the “Hamburger” menu and the right application menu, which is called, the “Waffle” menu.
The hamburger menu is used to navigate through the application’s different areas of management and configurations.
Figure 1: Example of Premium Integration Pro Navigation Menu
The waffle menu is your application menu where you can quickly navigate directly to an applications dashboard.
Figure 2: Example Applications Menu with all applications
Additional Information
Actions
What are actions?
Actions are jobs or activities that can started by authorized Client administrators, Power Users and Operators either manually by clicking the action button or some may be scheduled to start.
More information about Migration Scheduling
What actions are available?
Within Power365 Tenant-to-Tenant projects the following actions are available. For more detailed information, see Getting Started with Migration and Integration.
- Match – Match accounts against the target environment.
- Prepare – Prepare target accounts for migration and coexistence. (Requires Premium Integration)
- Sync – Start content sync.
- Sync – Start content sync and provision target licenses on 1st sync. (Requires Premium Integration)
- Stop – Stop active syncs and cutovers.
- Reset – Reset status to Synced or No Match.
- Cutover – Start final sync.
- Cutover – Begin mail routing switch and start final syncs. (Requires Premium Integration)
- Send Cutover Email – Resend mailbox cutover email.
- Send Guest Invite – Invite selected users and choose invitation preferences.
- Mark as Complete – Set the status to Complete when Synced, Finalizing or during Cutover Error.
- Archive – Permanently remove selected accounts from Power365.
- Add to Wave – Add to migration wave or create new wave.
- Add to Profile – Add to migration profile or create new profile.
- Rollback – Remove synced content from target mailbox.
- Export – Export selected items to a file.
Where are actions?
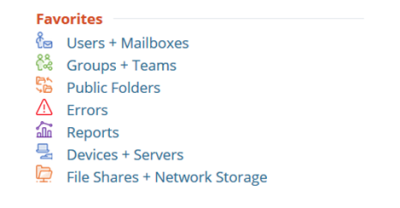
Actions are located within each migration workload management table. Click the left navigation menu and select the desired workload. Either Users + Mailboxes, Groups + Teams or Public Folders.
Figure 1: Example Migration Workloads Menu Options
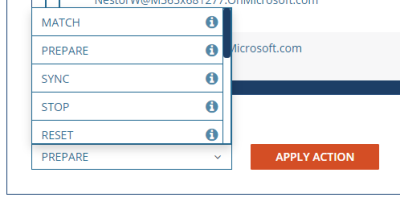
Once you have selected the desired workload, actions are located below the list of records. Simply select the desired records, the chosen action then Click, Apply Action. Alternatively, you may also apply actions to groupings of users and mailboxes from the Migration Waves tab.
Figure 2: Example Action Menu
Additional Information
Getting Started with Power365 Mail Migration and Integration

