
-
Title
How to use ApexSQL Mask in ApexSQL Manage -
Description
Managing SQL Server instances often requires various angles of approach depending on the nature of the given tasks. From performing server and database maintenance to health checks, there are several procedures a DBA must implement in order to perform their tasks. While certain tasks can be streamed together, some require a totally different set of tools to be completed in order to improve database security, for example database masking. Masking SQL Server data improves overall security of the SQL Server environment by hiding sensitive data. -
Resolution
In order to use ApexSQL Mask from ApexSQL Manage, a SQL Server instance must be discovered and added in ApexSQL Manage, detailed information on the discovering and adding SQL Servers process can be found in the article How to discover SQL Server instances, SSRS, SSAS and SSIS services across the network.
Once this process is completed and ApexSQL Manage is connected to the desired instances, go to the Tools tab in the main ribbon menu.
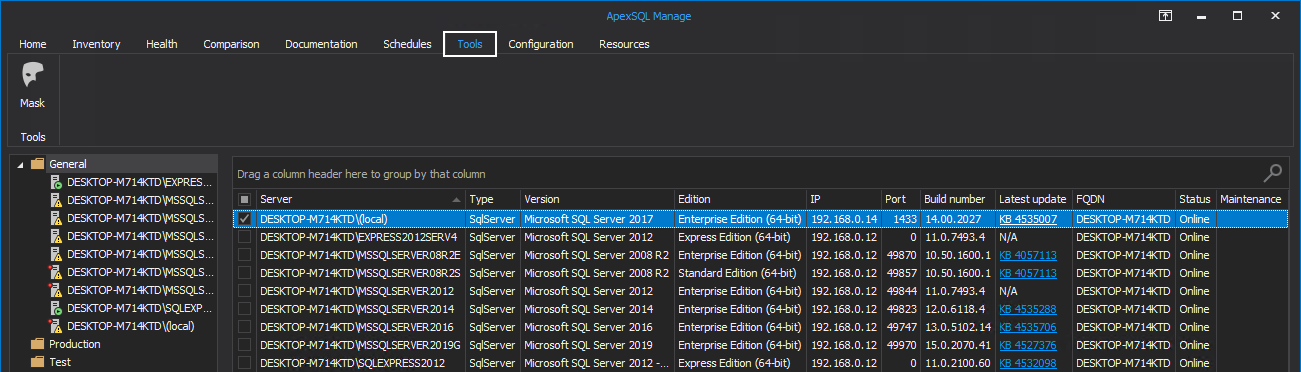
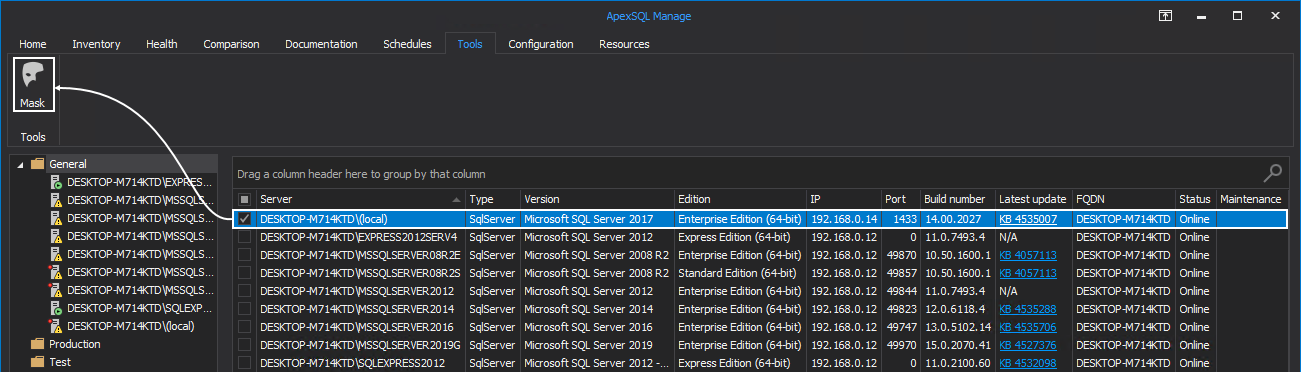
Check the desired instance from the shown grid that contains a database with sensitive data and click the Mask button. This will run ApexSQL Mask with the dialogue to establish connection to appropriate instance.
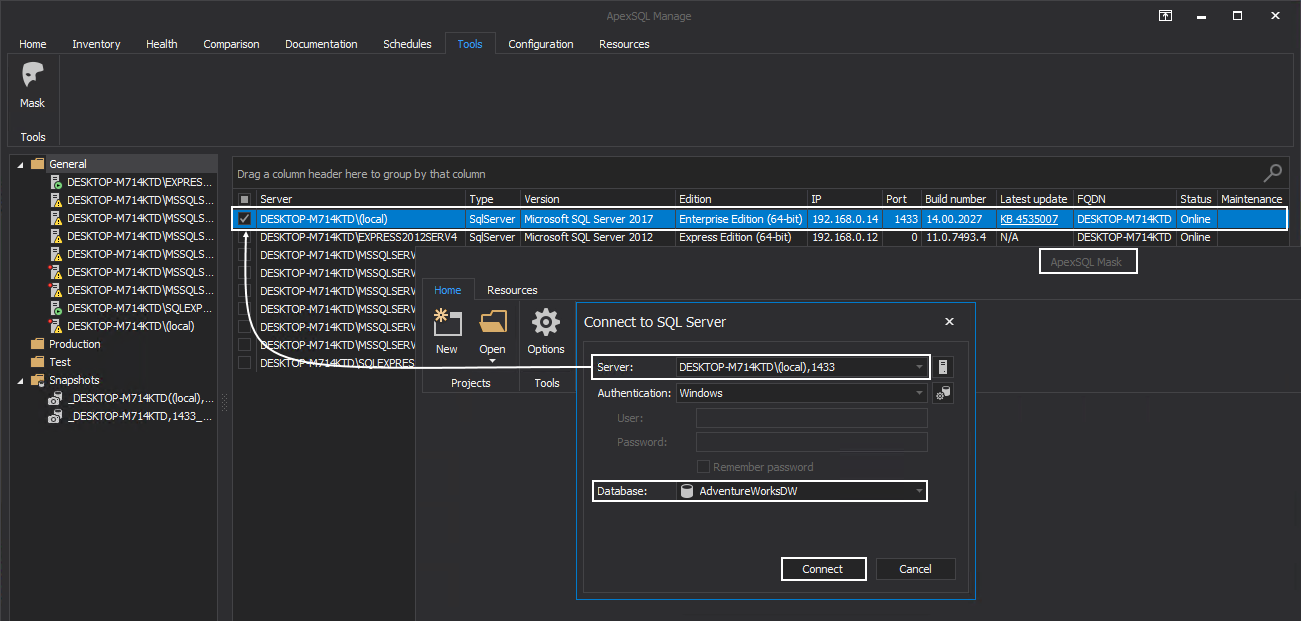
The instance that ApexSQL Mask connection dialogue will pick automatically is the one that was checked in ApexSQL Manage. From here, simply select a database that contains sensitive data and click on the Connect button in order to continue with the masking configuration. For this example, AdventureWorksDW database will be used:
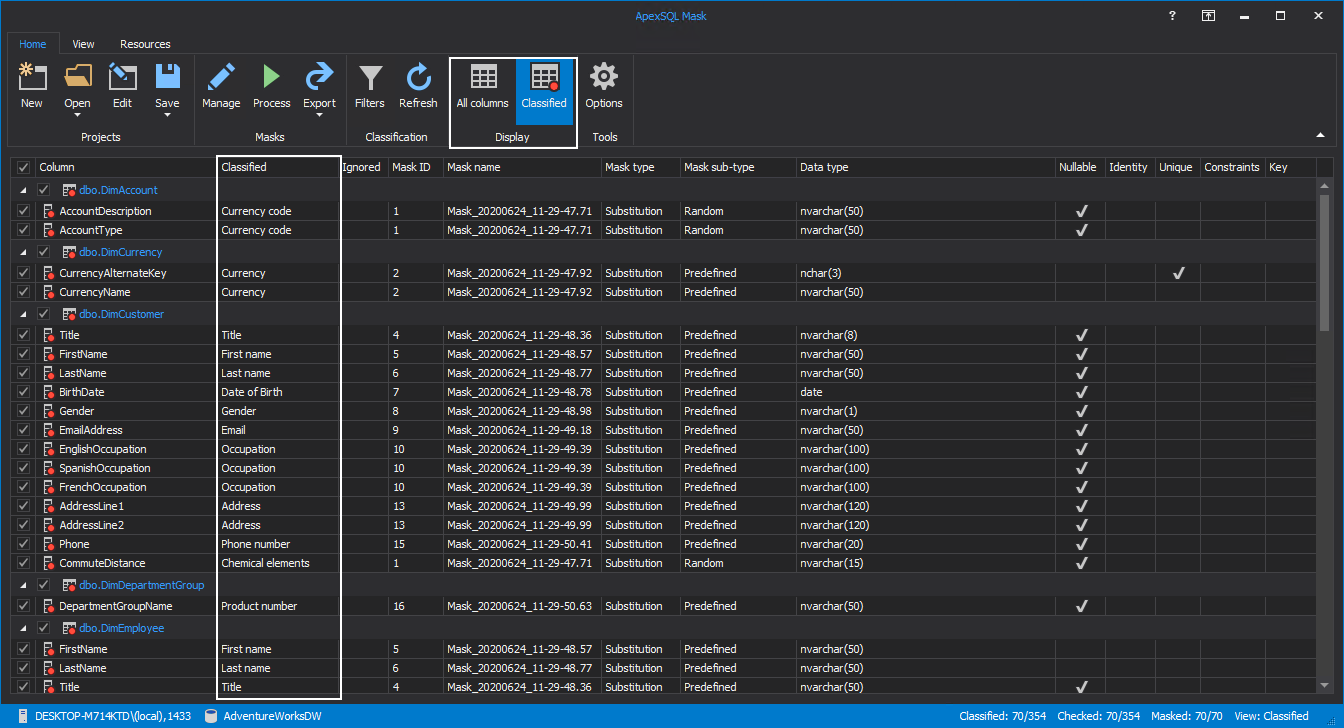
While ApexSQL Mask is connecting to the desired SQL Server instance and database, the tool will automatically scan the database for sensitive data and show columns that contain the said data. To toggle between different views, All columns or Classified buttons from the Display group can be used to show all the columns in the database or just the columns that have been auto-detected as sensitive:
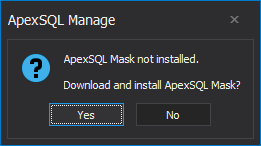
If ApexSQL Mask is not installed on the local machine, where ApexSQL Manage is running, clicking on the Mask button will result in prompted message saying that ApexSQL Mask is not installed and will offer to download the tool and install it:
When ApexSQL Mask is successfully installed, clicking the Mask button again will result in actions described above.