
About Universal Access
Universal Access is an additional feature of Archive Manager for Exchange. It is used as an additional IMAP server. When a user connects to this server, the email client downloads only archived emails. It consists of two components:
·MAM IMAP Server Service this service processes IMAP requests from clients and outputs responses for these requests.
·MAM IMAP Wcf Service communicates with Archive Manager for Exchange.
Software Requirements
·.NET Framework 4.8
·Windows Server 2016 and higher
·Archive Manager for Exchange 8.9
·Database
oMS SQL Server 2014 or higher
oOracle 19c or higher
Supported clients for Universal Access
·Outlook 2016
·Outlook 2019
·Outlook 2021
·Mozilla Thunderbird 31.5.0 and above
·Android 8 - default email client
·iOS 11 and above - default email client
Installation
To install Universal Access follow the steps described below:
1.Run the installer. The default location is C:\Quest\Archive Manager Installation Package\Universal Access\Archive Manager Universal Access Setup.exe.
2.On the Welcome window click Next. The License Agreement window opens.
3.Read the license terms and if you agree, click Yes to continue. The Choose Destination Location window opens.
4.Review the destination location. Click Change to alter the location if necessary.
5.Click Next. The Select Archive Manager for Exchange Server window appears. Enter the following information:
·Archive Manager for Exchange - name of the Archive Manager for Exchange server or click Browse to manually locate the server.
·Use HTTPS - select this checkbox to use the HTTPS protocol.
Click Test server to verify that the connection to the Archive Manager for Exchange server is successful.
6.Click Next. The HSM Server window appears. Enter the following information:
·HSM Server - name of the HSM Server or click Browse to manually locate the server.
Click Test server to verify that the connection to the HSM Server is successful.
7.Click Next. The Logon Information window opens. Enter the credentials of the user and confirm the password. Typically this is the administrator or the superuser account used in Archive Manager. If the components are being installed on a different domain computer, the user must have sufficient privileges to run the services.
8.Click Next. The Firewall Settings window opens. Select the check box to allow the installer to add selected Archive Manager Universal Access services to the Windows Firewall Exception list. Archive Manager components will be then able to communicate through the firewall.
9.Click Next. The Ready to Install the Program window opens.
10.Click Install. The Setup Status window opens to display the progress of the installer.
11.When the InstallShield Wizard Complete window opens, click Finish to continue with the configuration.
Configuration
When the installation completes you must configure the feature with the Archive Manager Configuration tool as described in the steps below. .
Configure the Database Server
1.When the installation completes the Archive Manager Configuration tool opens. You can also click Start > Quest > Archive Manager Configuration to open the Archive Manager Configuration tool. Depending on your environment you may see several tabs on the left feature pane. If you install the Universal Access feature components on a computer that does not have the Archive Manager Configuration tool pre-installed, a new Archive Manager Configuration tool is installed on that computer, and only the Universal Access tab is visible.
2.Click the Universal Access tab to start configuring the feature.
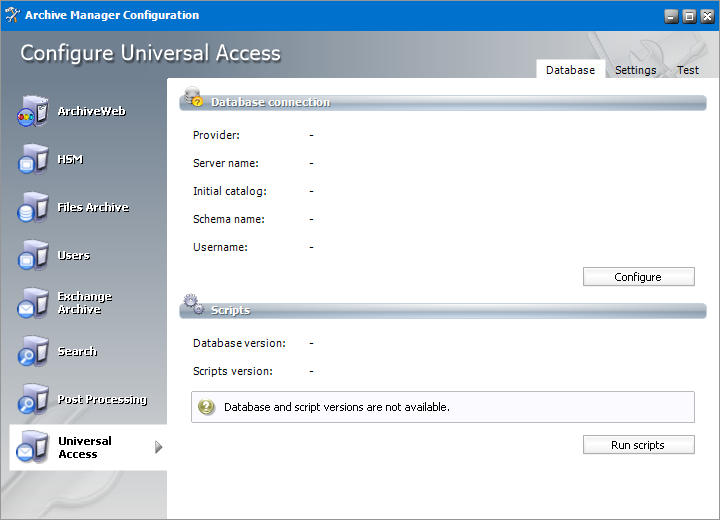
3.Click Configure. Choose your database provider.
|
|
NOTE: The configuration tool can create the MS SQL database in the specified SQL Server. However, an Oracle database must be available in advance. |

4.Click Next. Depending on your choice of database provider fill in the text fields as described below:
For Microsoft SQL Server
a.Server name - name of the SQL server.
b.Initial catalog - name of the Archive Manager database (e.g. MAMEXCH)
c.Schema Name - name of the SQL Schema (e.g. dbo)
d.Authentication - authentication type used for the database. Choose either Windows authentication or SQL Server authentication.
e.Username - database login username if SQL Server authentication is the selected as the authentication mode.
f.Password - password of the database user if SQL Server authentication is the selected as the authentication mode.
|
|
NOTE: When updating Archive Manager from one version to another you must not change the following values in the Configuration tool on any of the tabs: Server name, Initial catalog and Schema name. |
For Oracle
a.Oracle net name - net service name that describes the network address of the database server in your tnsnames.ora file.
b.Schema - name of the Oracle schema from your tnsnames.ora file.
c.Username - database login username.
d.Password - password of the database user.
5.Click Next. The database provider settings are used to verify the database connection. Back on the Universal Access tab run the sql scripts by clicking Run Scripts.
6.Click Run Scripts. The list of the scripts will appear.
7.In case of SQL Authentication, click Next once more to accept the database login user and its password.
8.Click Next to run the scripts.
Configure server settings
1.Click the Settings tab to open the configuration window for the IMAP Server.
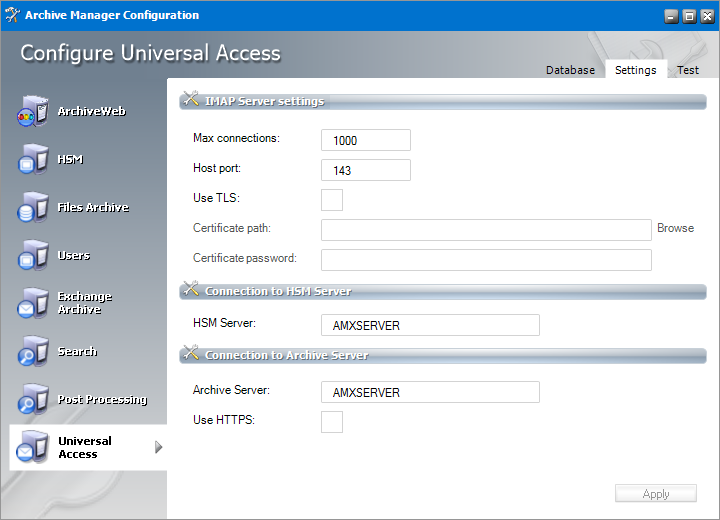
Provide the information as described below:
For IMAP Server Configuration
This section is used if the IMAP Server for Archive Manager component has been installed.
·Max connections - max number of clients using Universal Access.
·Host port - enter the port number. The Port number needs to be changed only if TLS communication is used. In such cases enter 993.
·Use TLS - check whether you are using TLS communication. If TLS communication is used, configure certification details, otherwise these options can be ignored.
oCertificate path - select the location of your certificate.
oCertificate password - specify if applicable.
For HSM Server Configuration
·HSM Server - enter the HSM Server name.
For Archive Server Configuration
·Archive Server - enter the Archive Manager server name.
·Use HTTPS - select this checkbox to use the HTTPS protocol.
2.Click Apply to save the settings.
Test the configuration
1.Click the Test tab to test your configuration.
2.Click Run test. The results will be displayed in the results log.
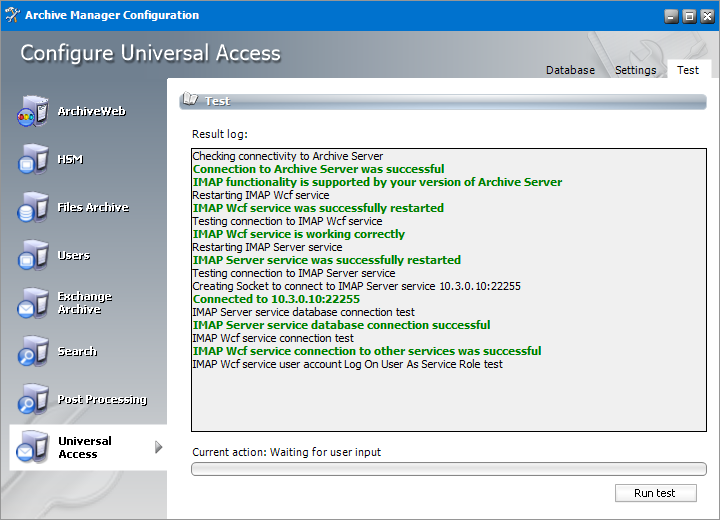
3.View the results in the Result Log pane.